Creating a new form
Quickstart
Let's take you from zero to published in just a few minutes.
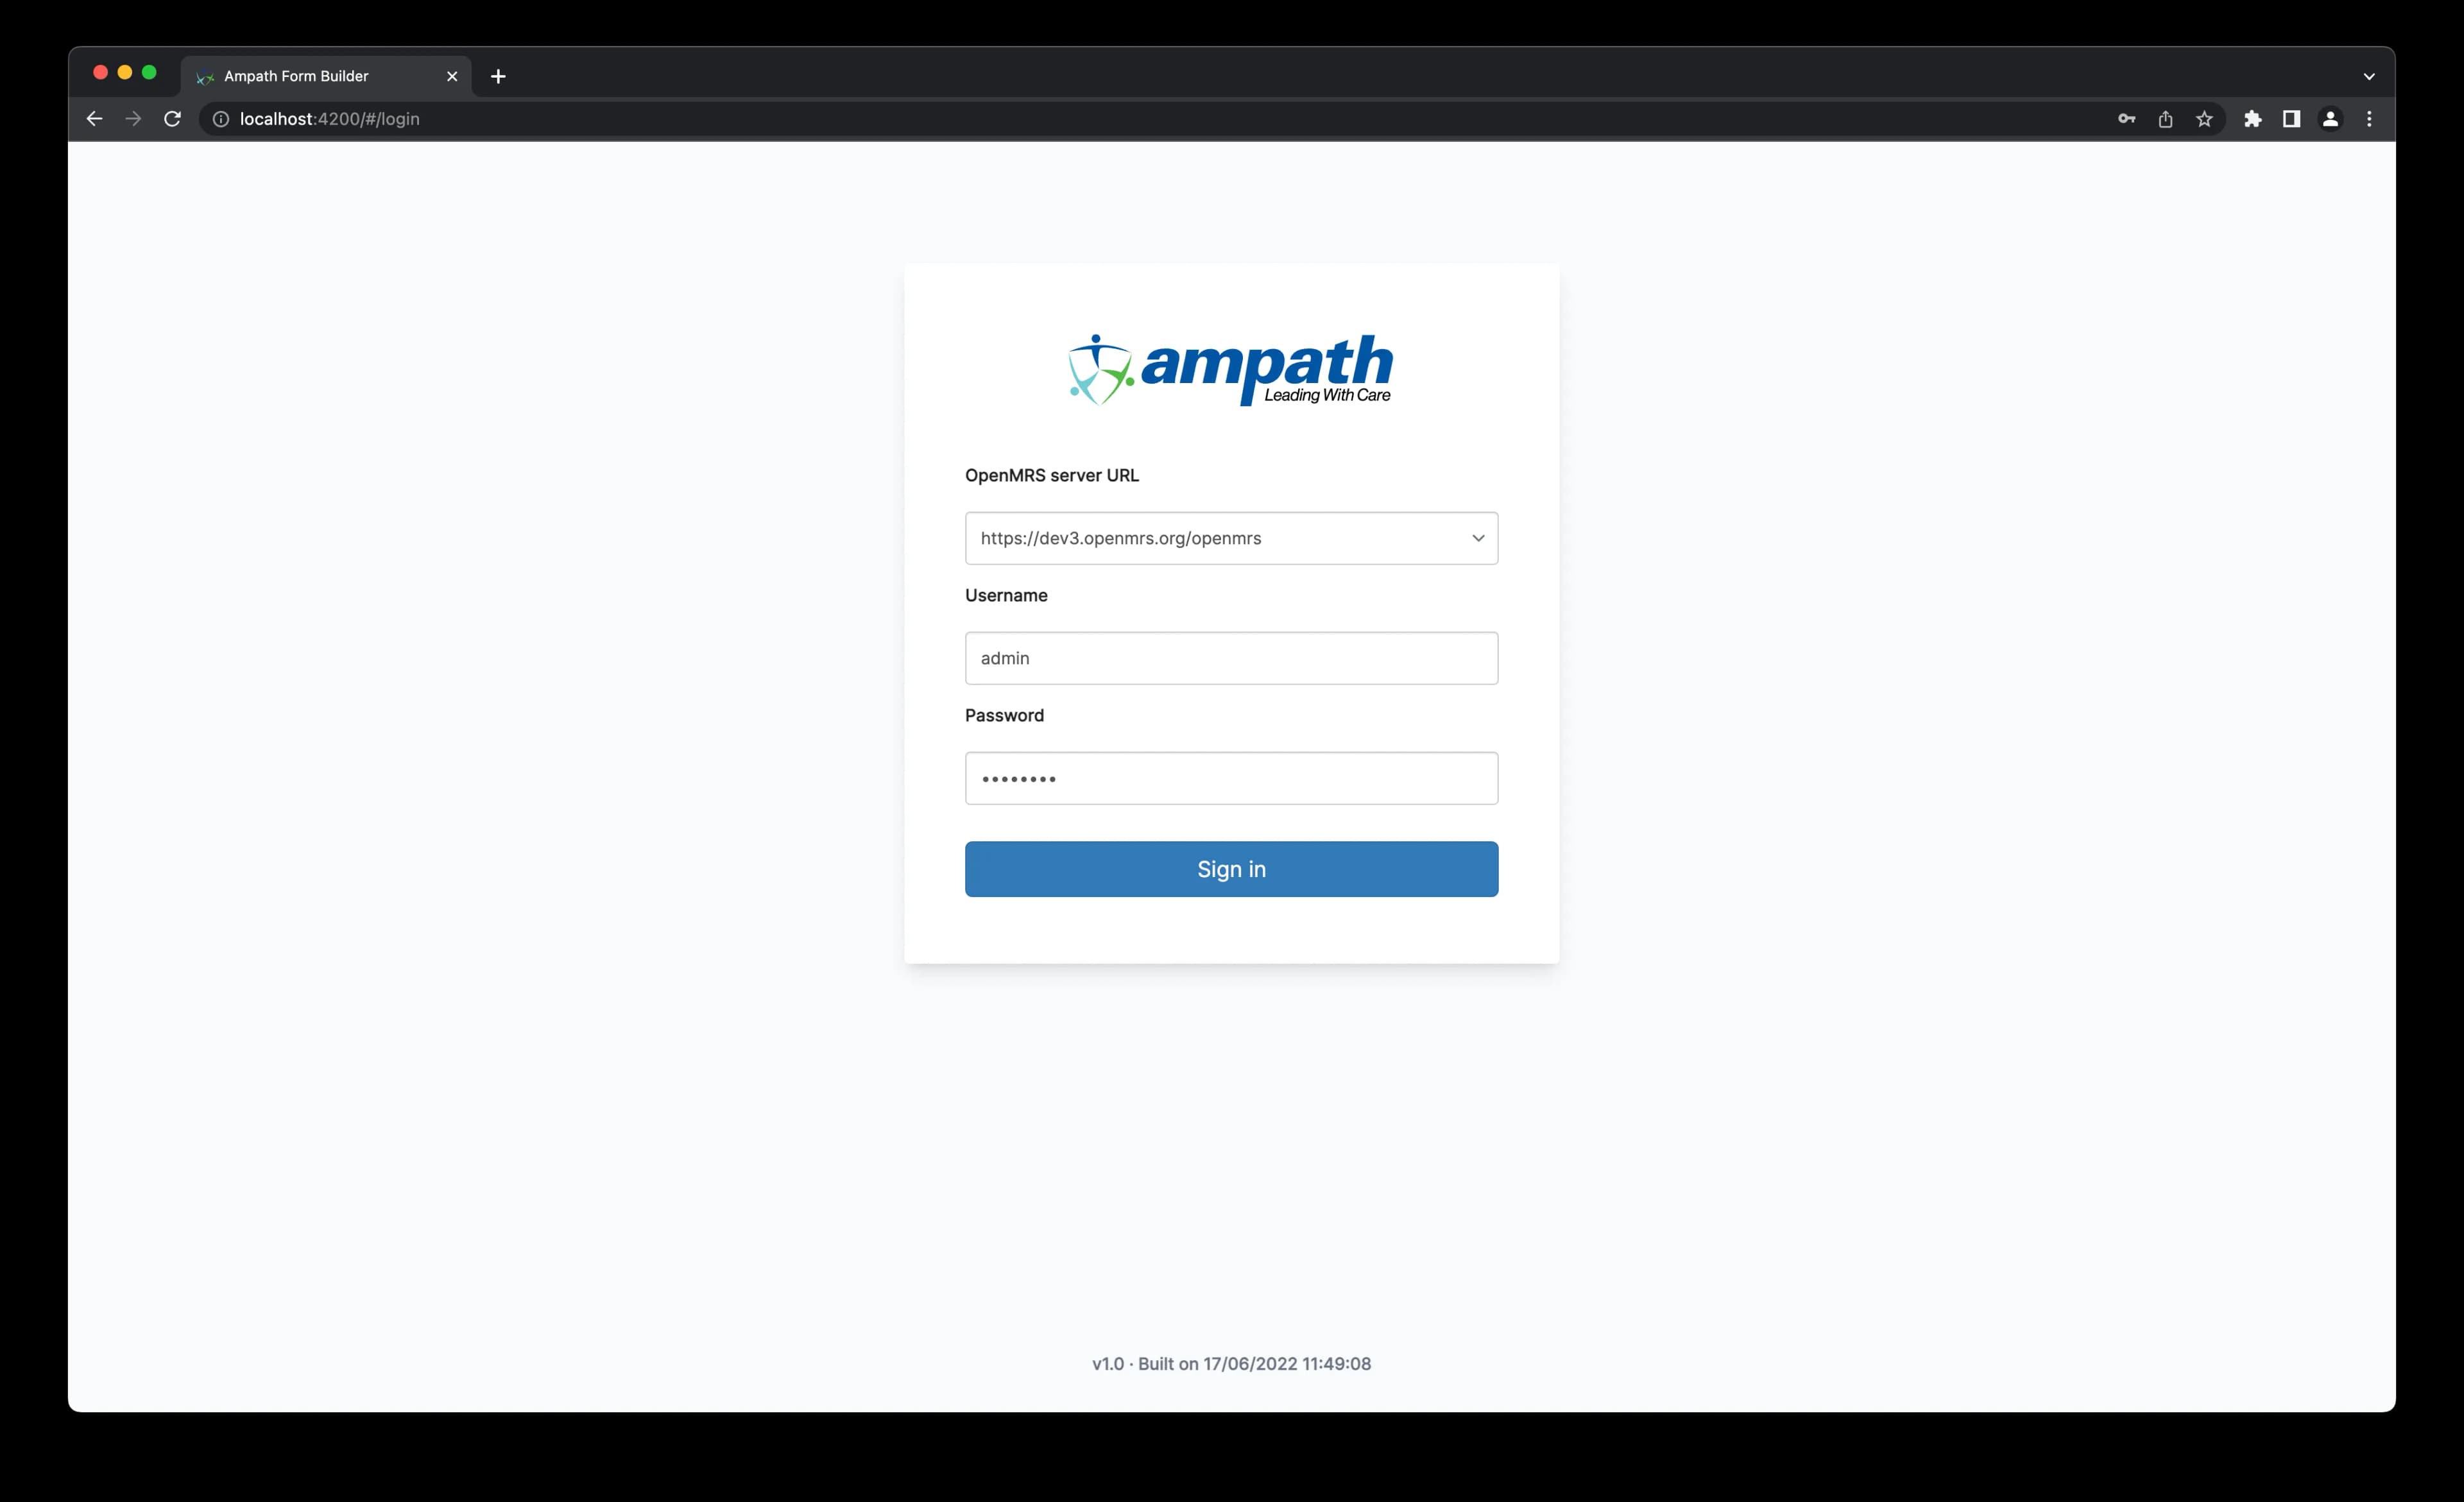
Visit the Form Builder website (opens in a new tab) and sign in with the following credentials:
- OpenMRS Server URL:
https://dev3.openmrs.org/openmrs - Username:
admin - Password:
Admin123
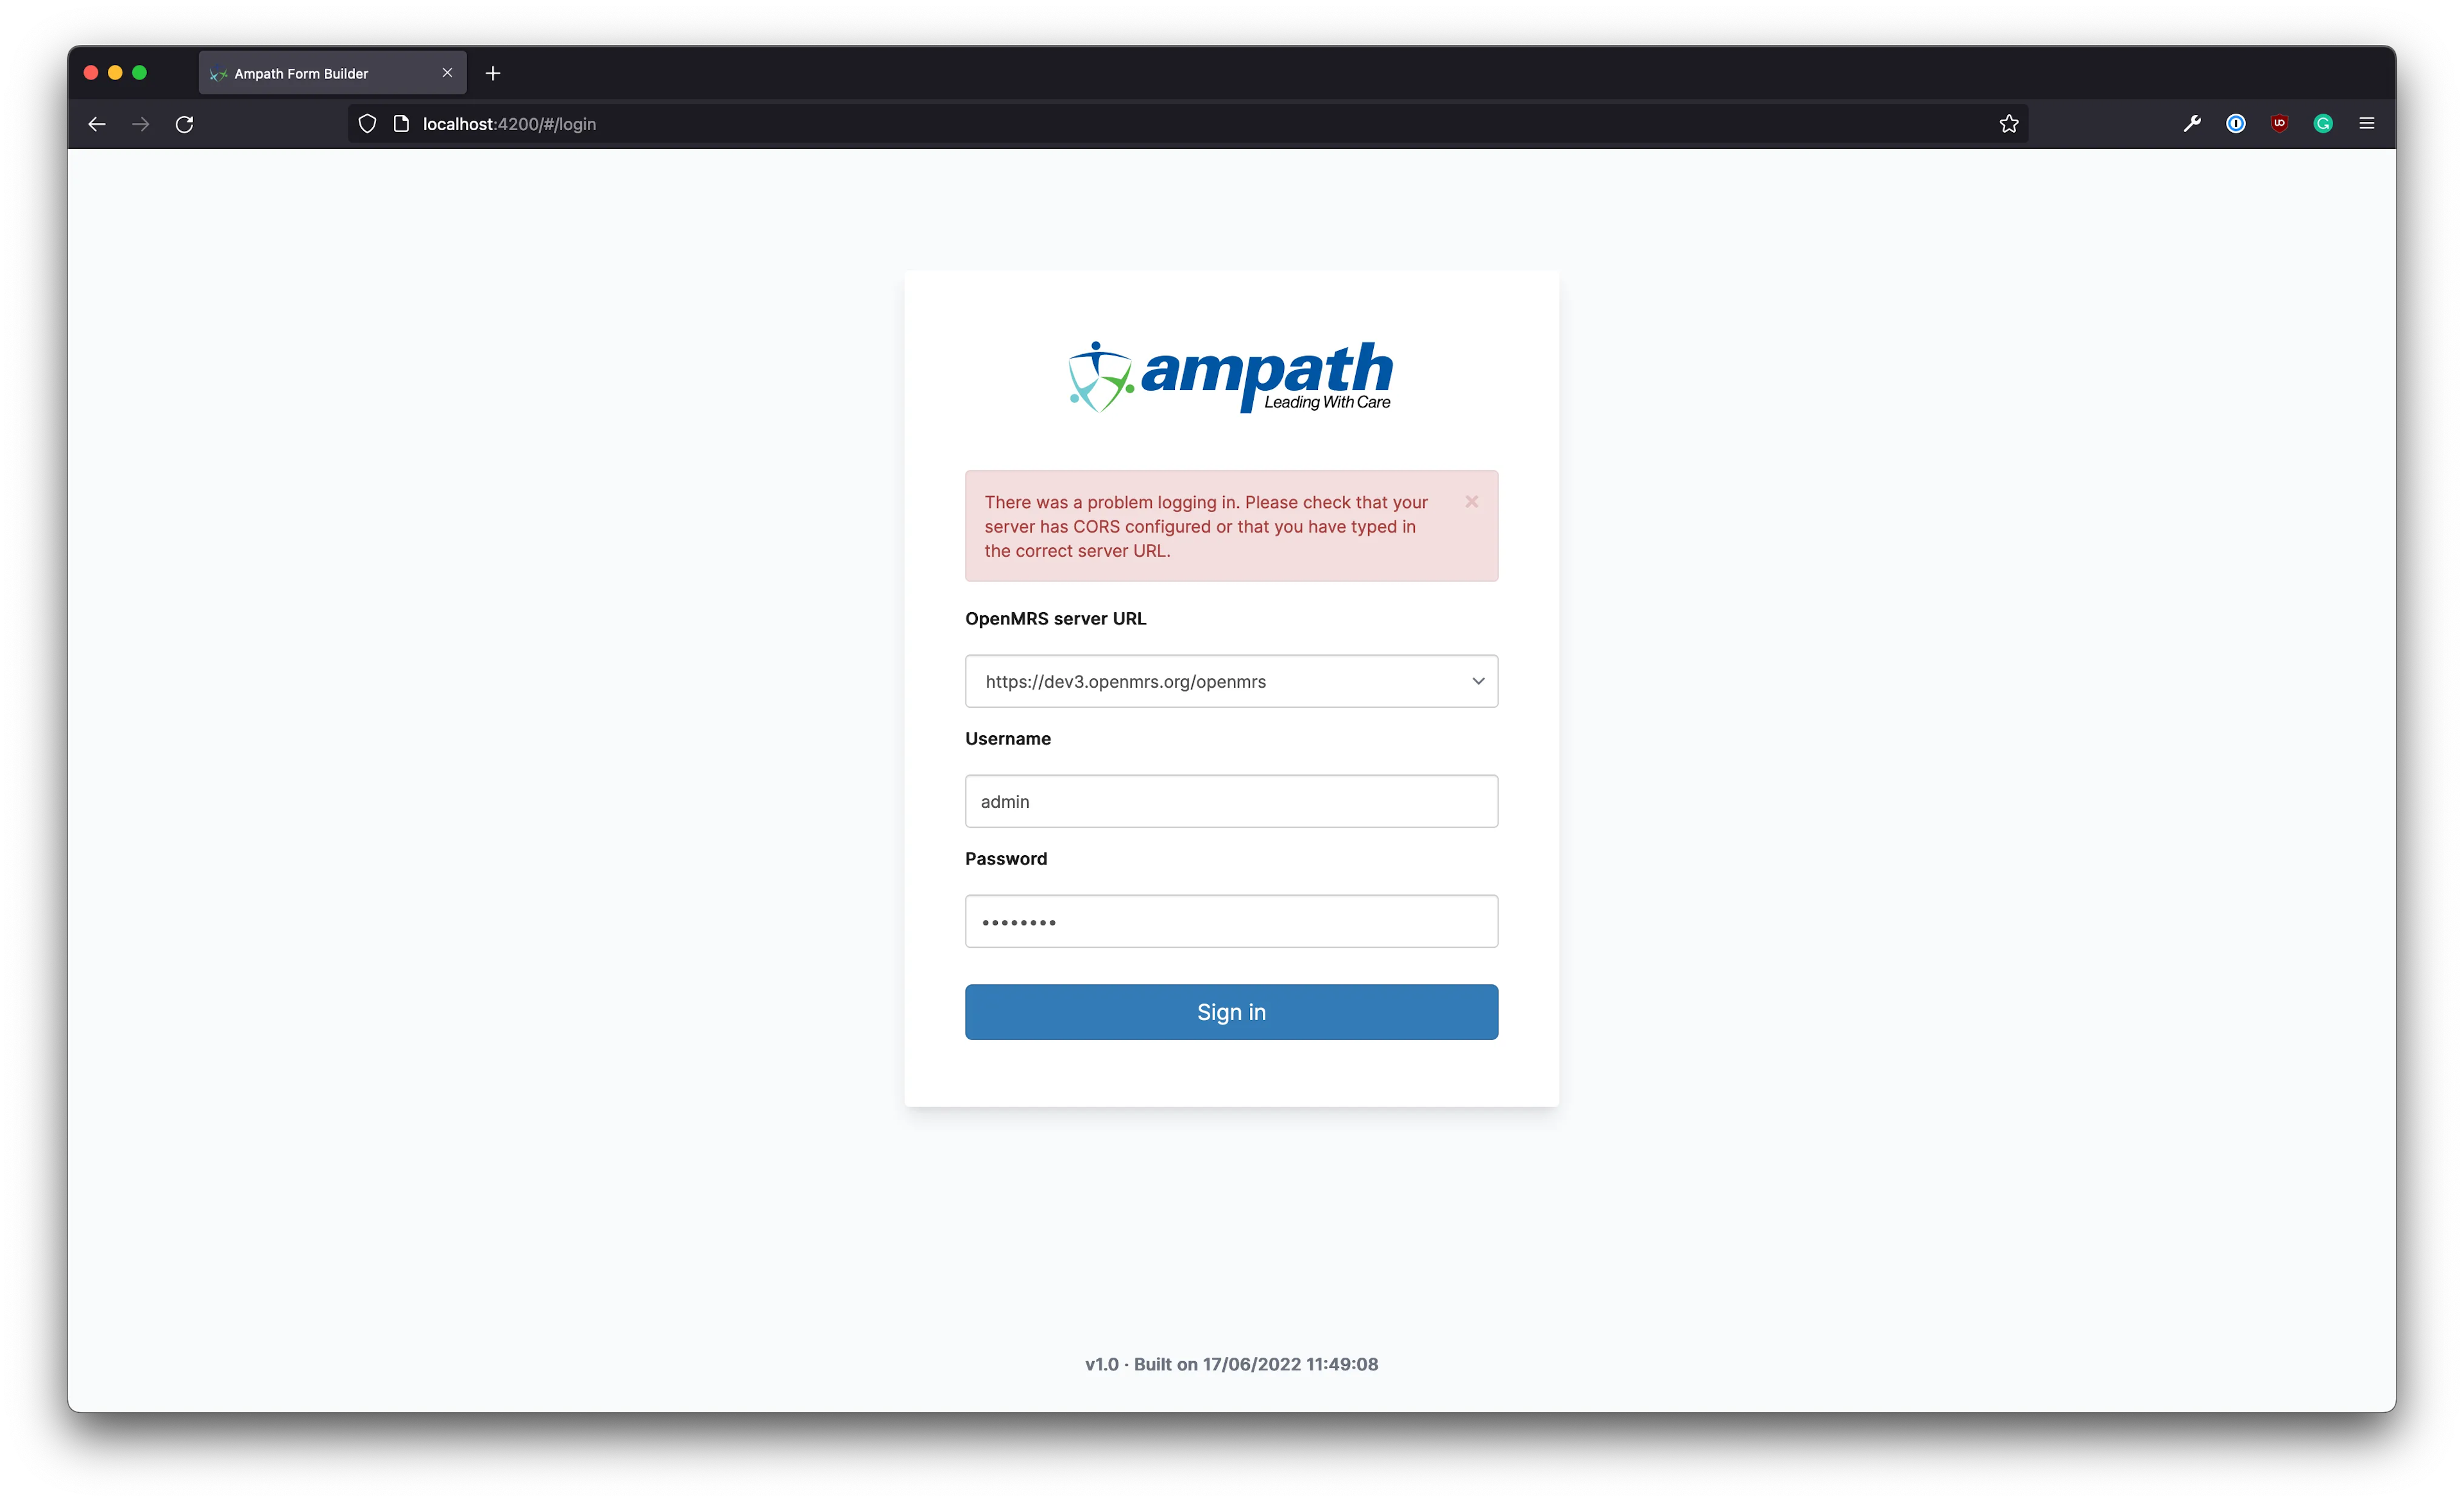
If you experience problems logging in, it could be due to CORS. As the Form Builder frontend runs on a different server than the backend, we rely on CORS (opens in a new tab) to handle communication between these two origins. You may need to configure your server or install an extension in your browser that bypasses CORS checks to log in successfully.
Create a New Form
Click the button labelled Create a new form in the navigation bar.

You will be directed to the Schema editor. You could toggle between a Tab view and Split view from the View option in the navigation menu. By default, the editor will have a basic schema scaffold open.

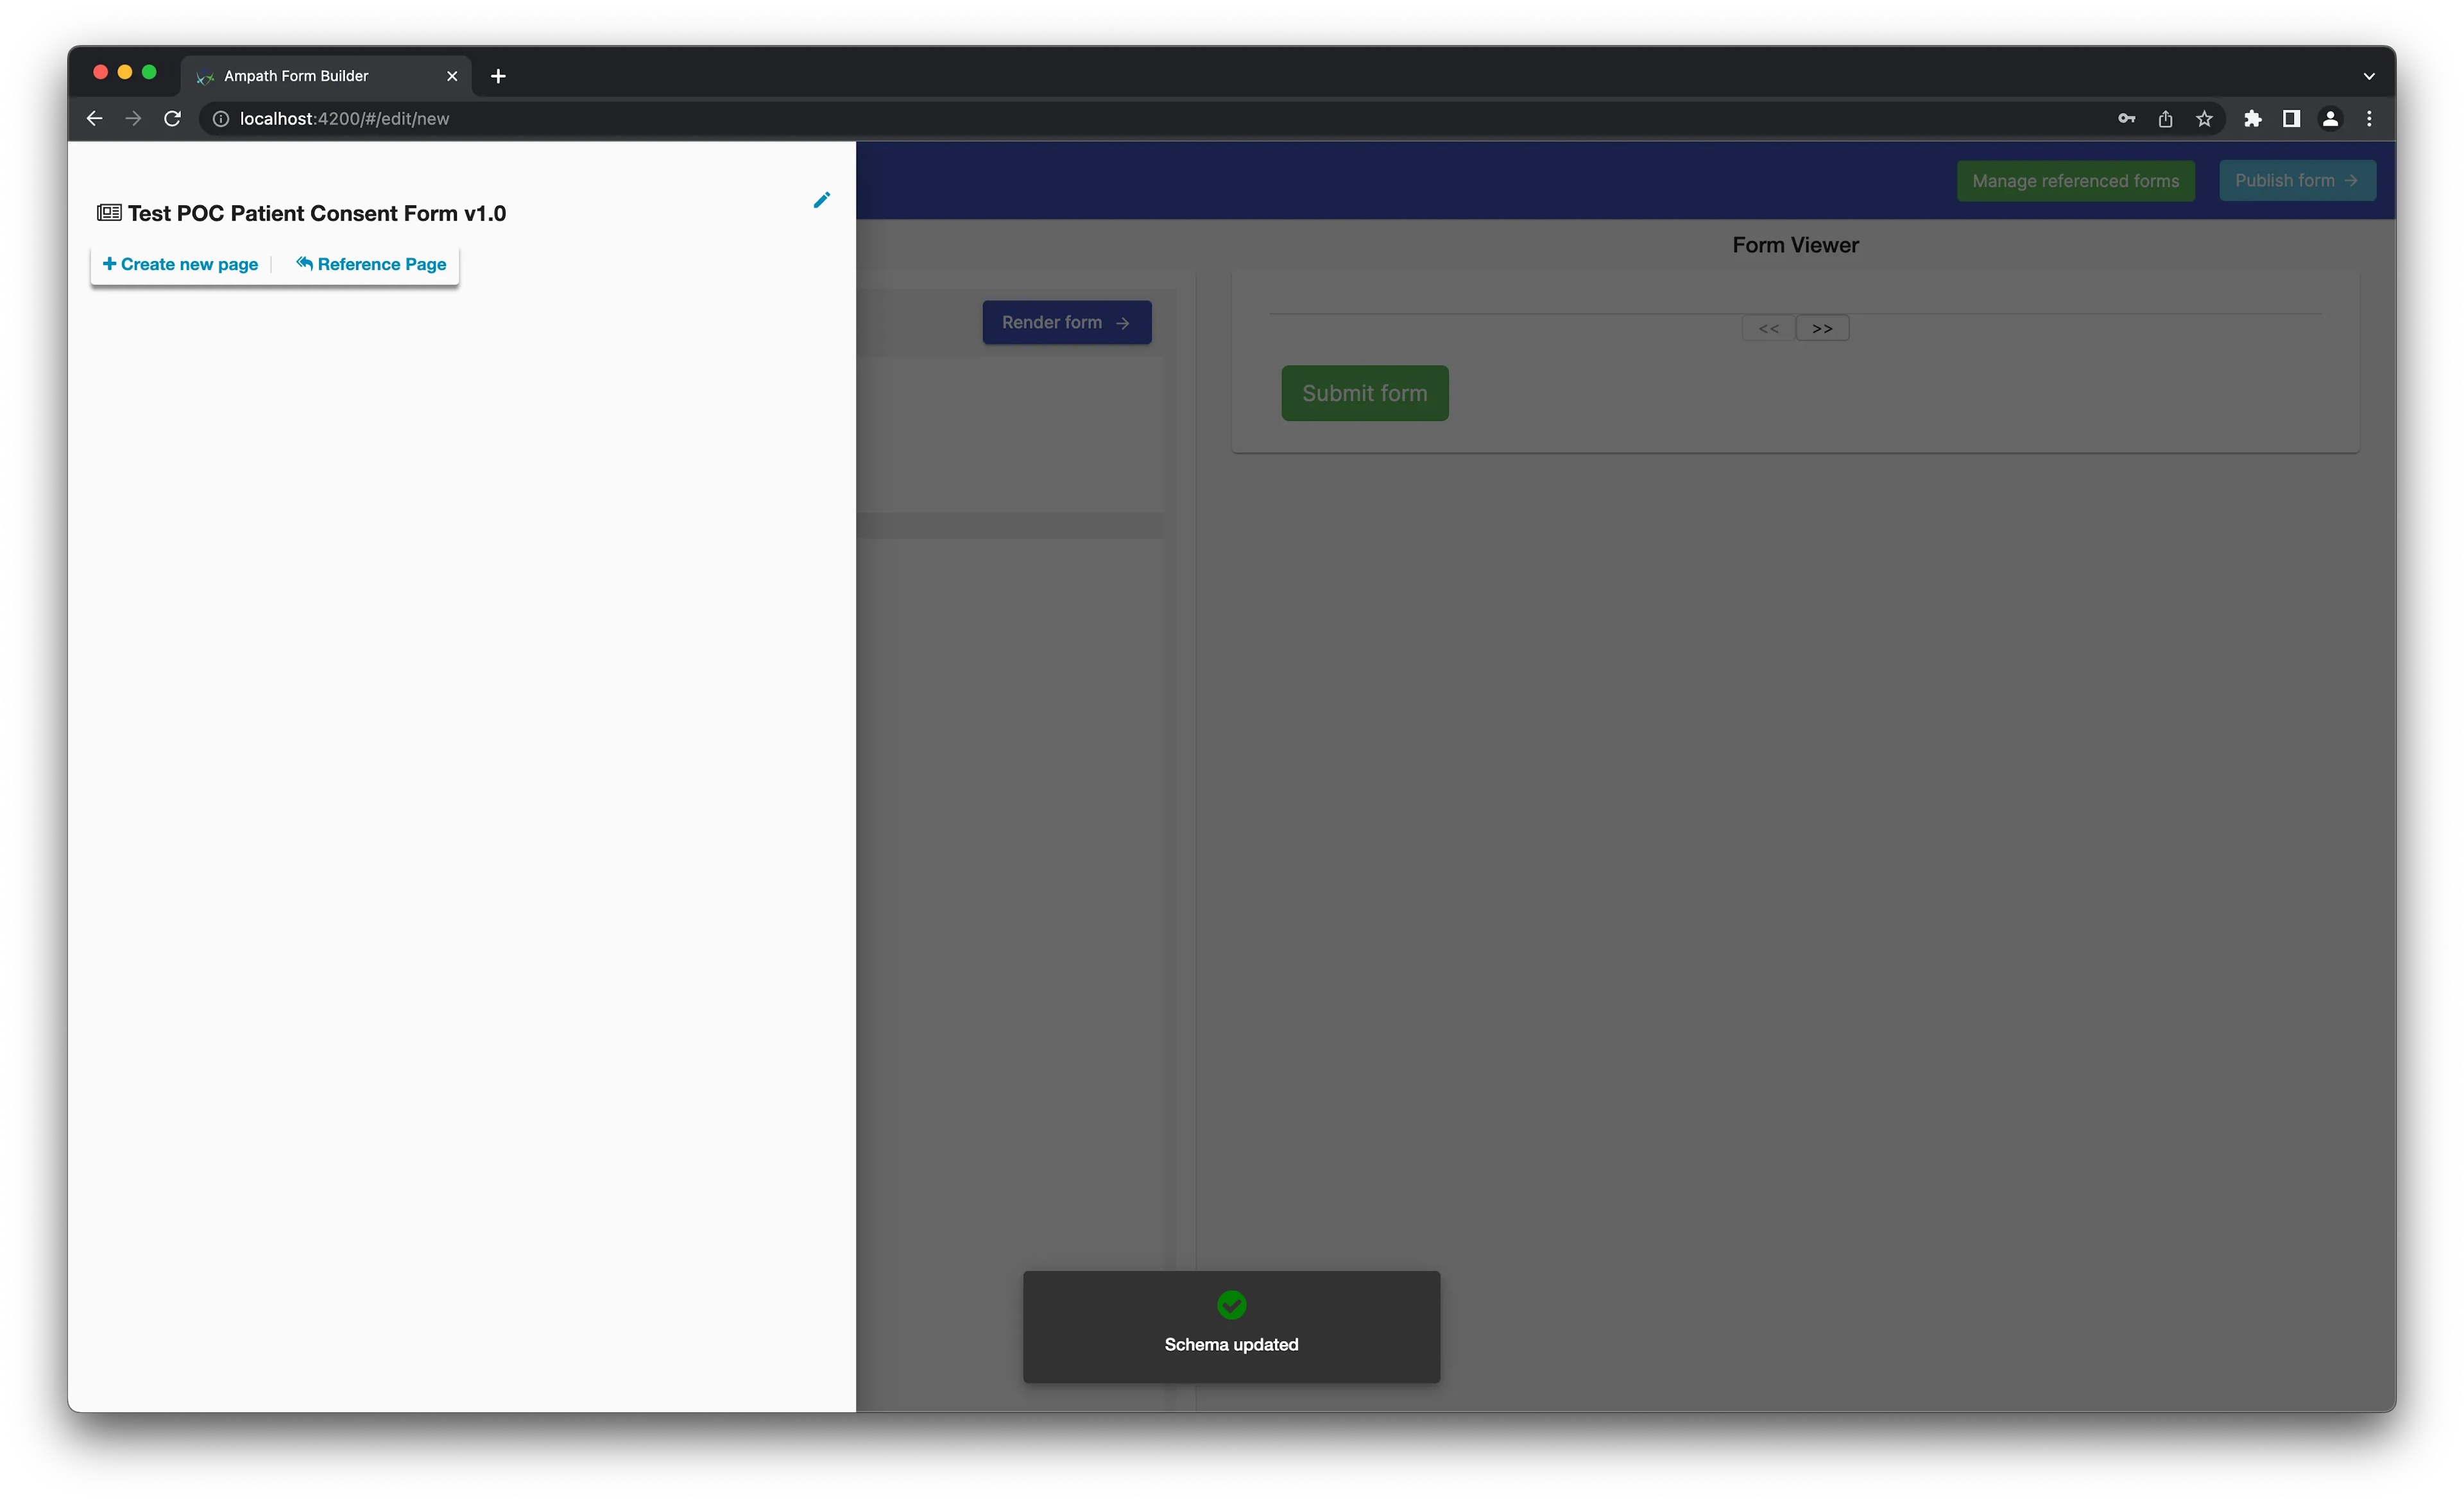
Next, you'll need to provide a name for the new form. You could type in the name directly into the name field of the schema. Alternatively, you could use the interactive schema builder. Click the hamburger menu in the navbar to launch the builder. Type in Test POC Patient Consent Form v1.0 as the name of your form. Click the green tick to the left when done to update the schema.
Presently, your form name must to contain the word POC for it to be deemed valid. For example, Test POC form is a valid form name while Yet Another Test form is not.
Add a Page
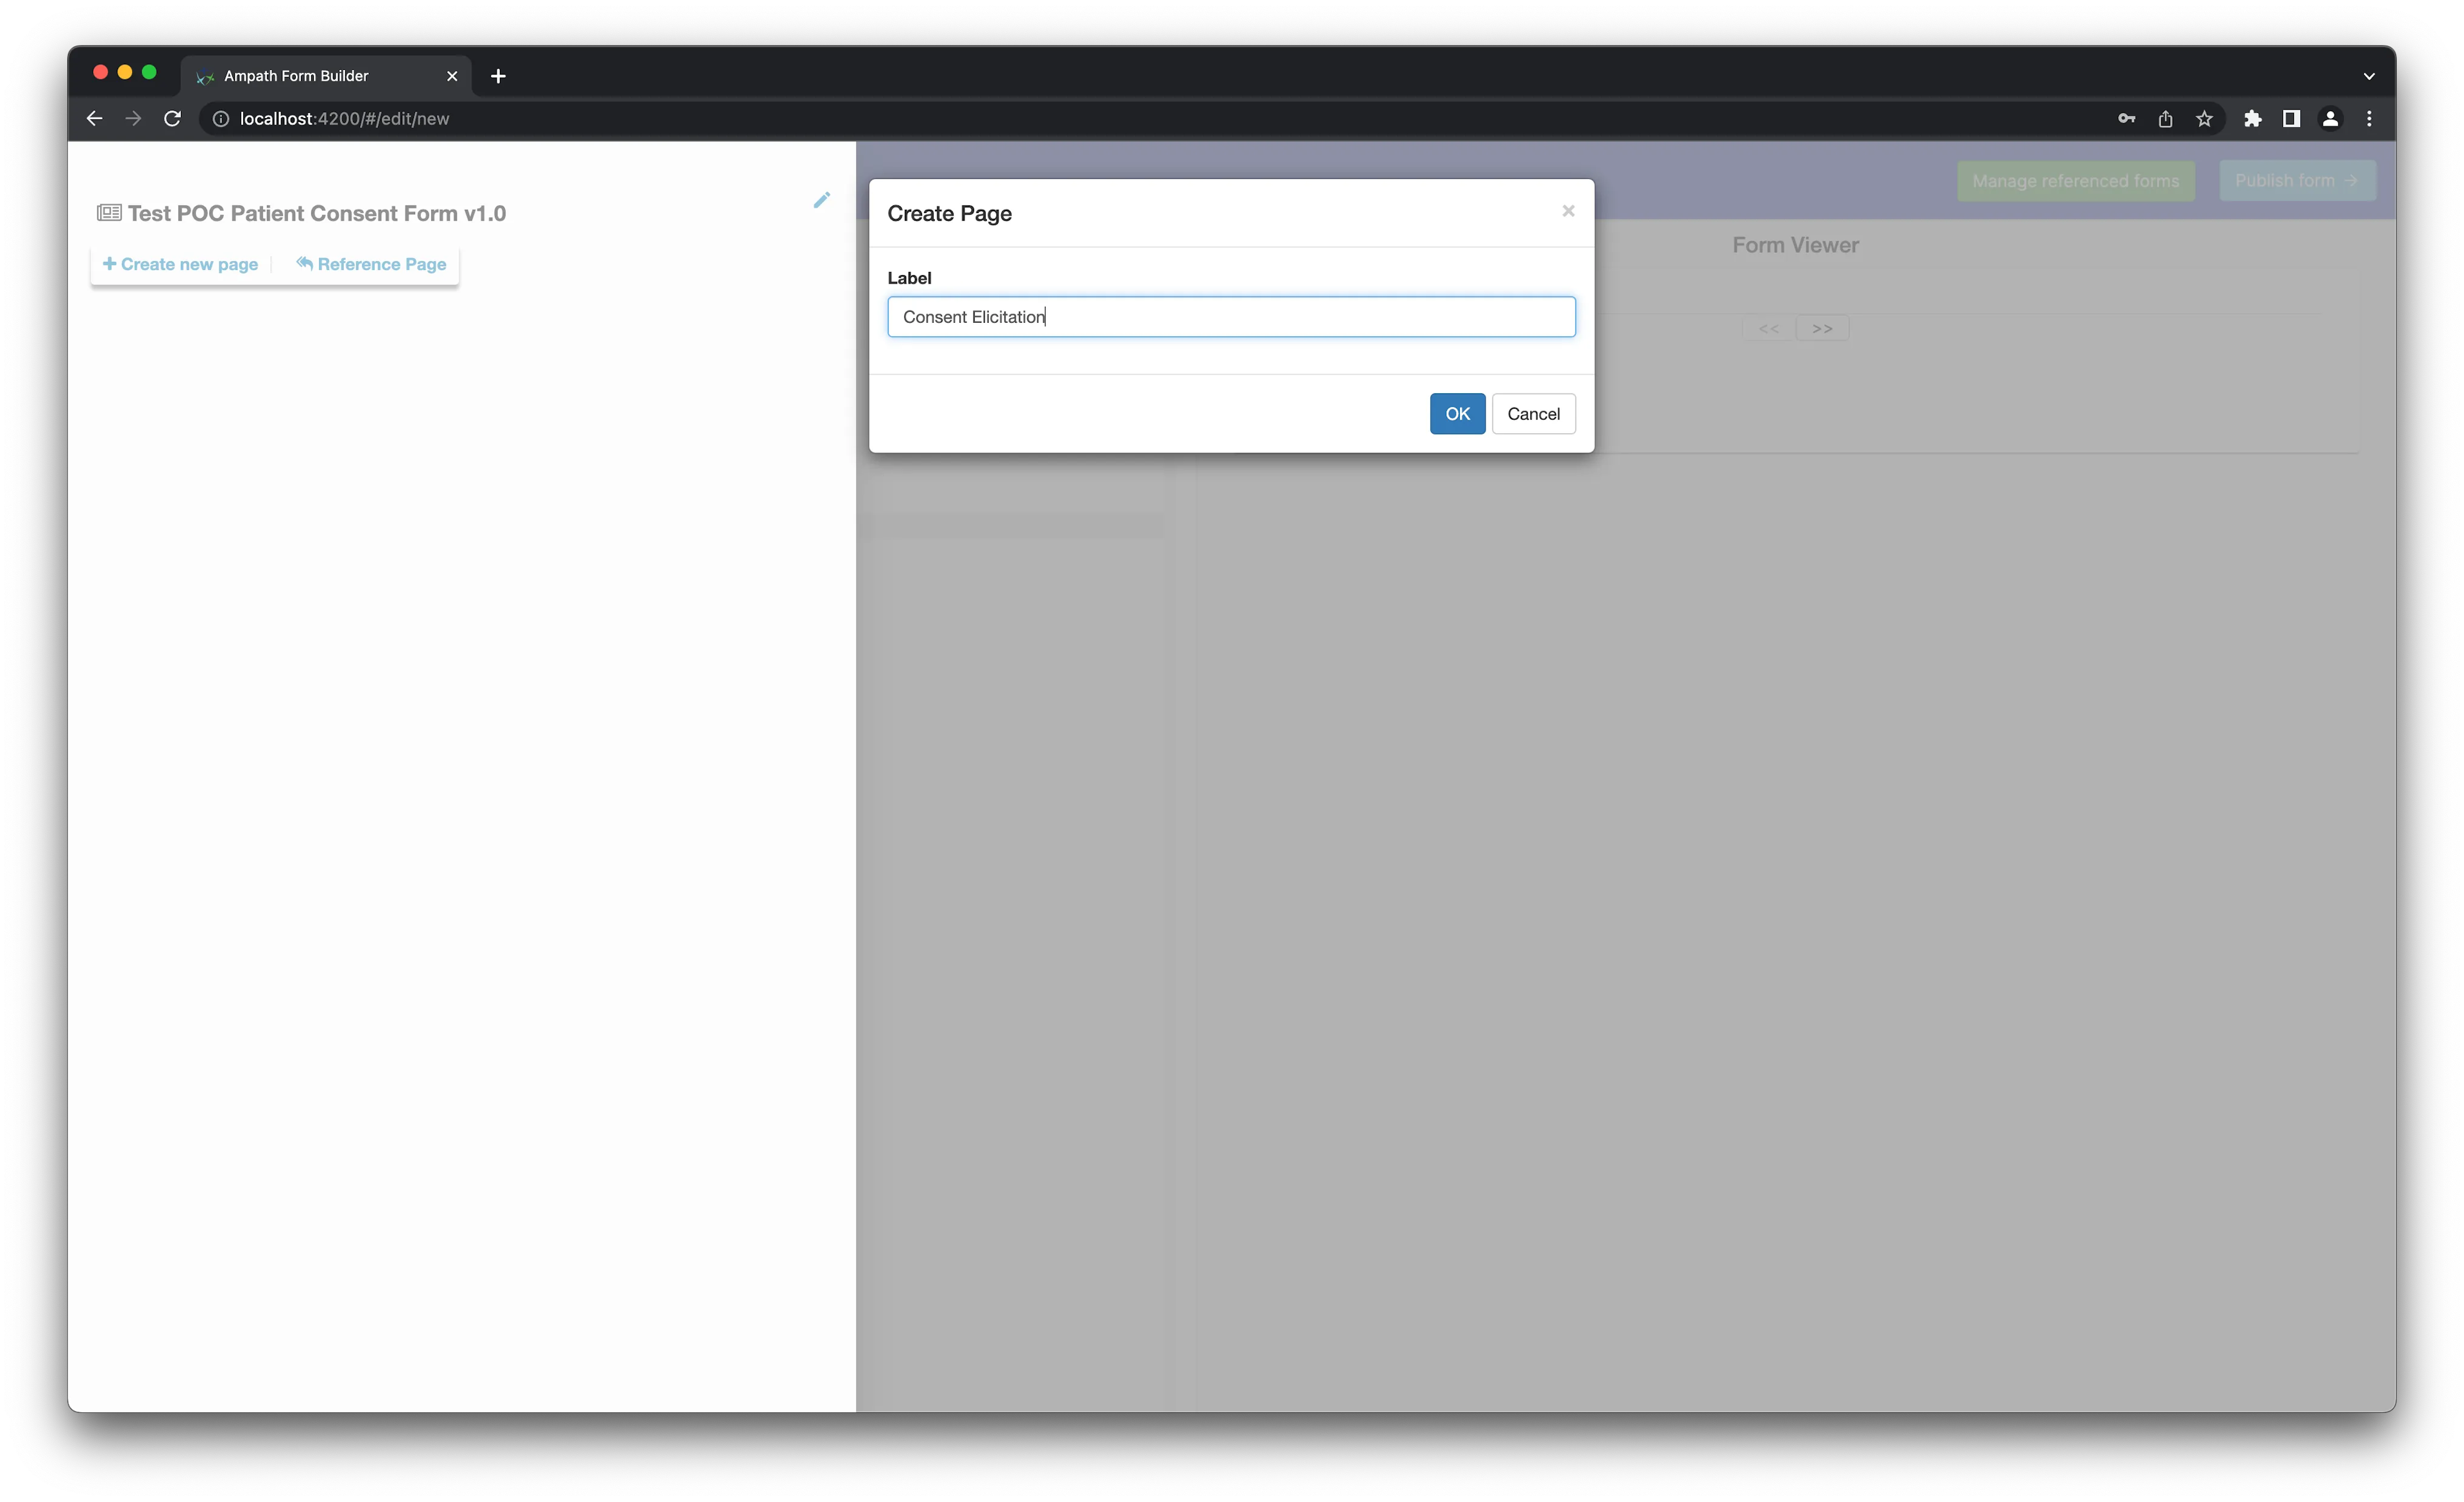
Add a page by clicking Create new page. This should launch a modal where you can provide a page label. Let's add a page labelled Consent Elicitation.
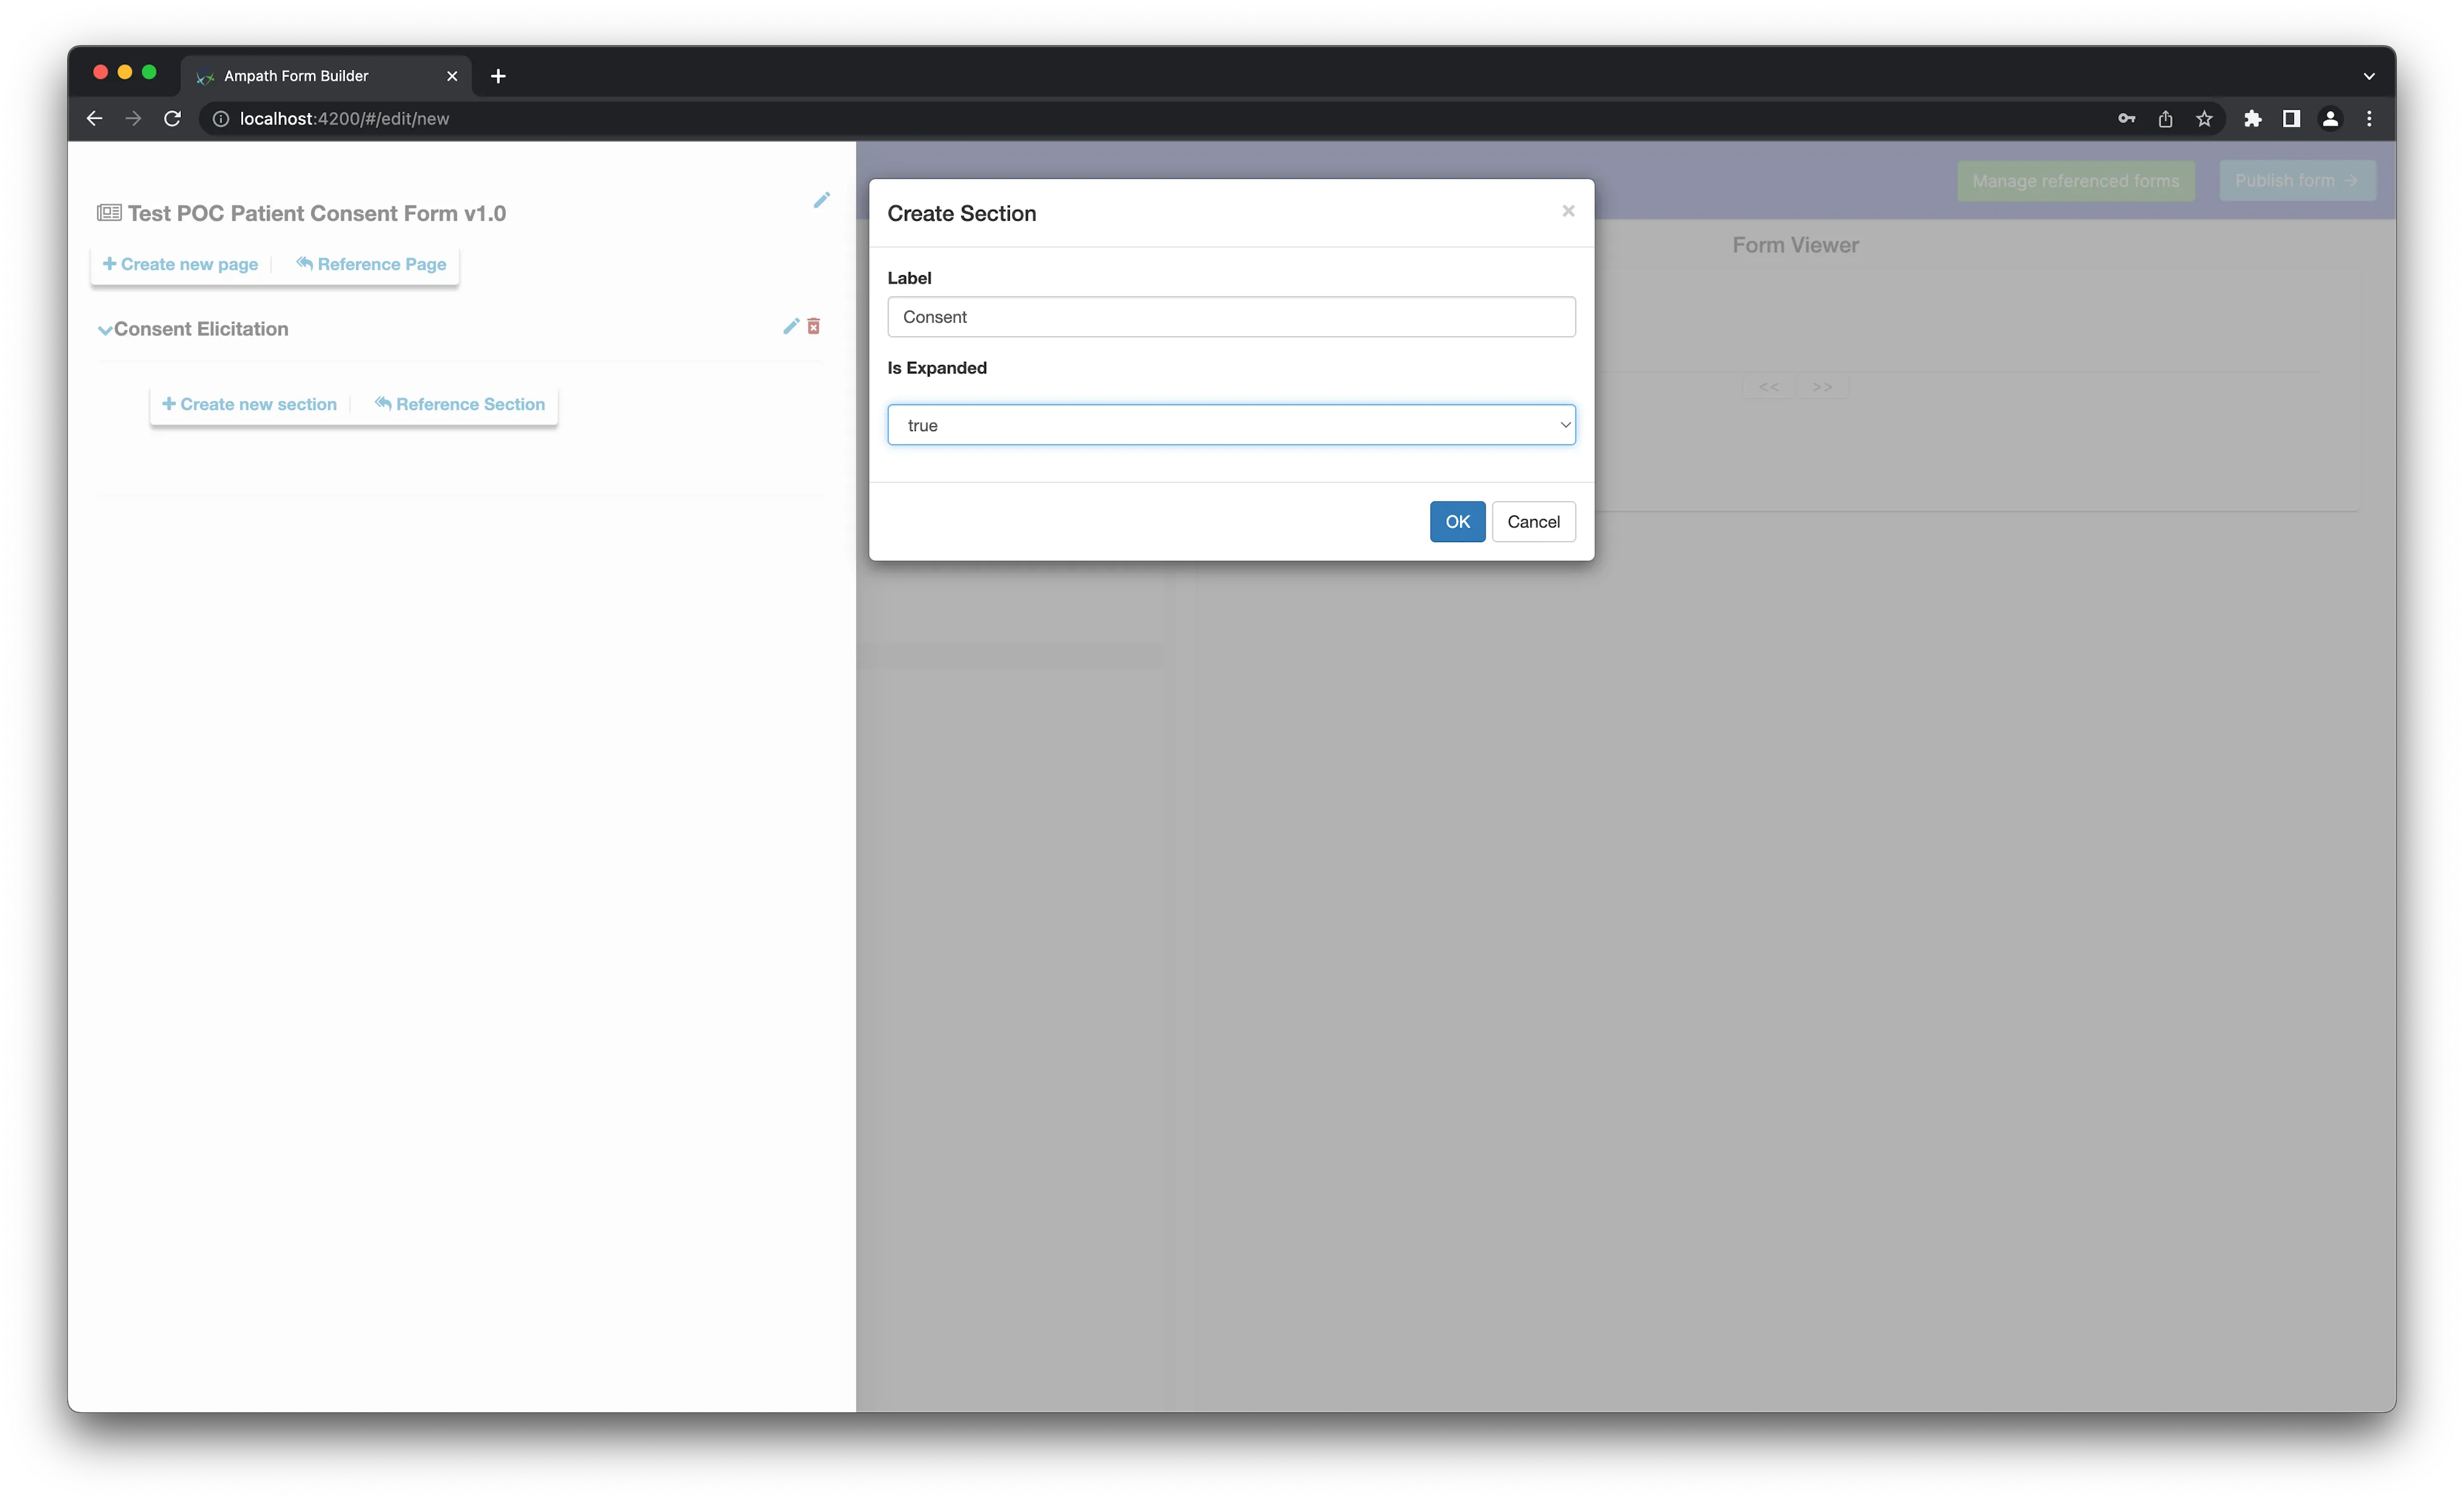
Add a Section
Add a section by clicking Create new section. We'll add a section to the form labelled Consent. Sections are rendered in collapsed mode by default. Set isExpanded to true so the section gets rendered in expanded mode.
Add a Question
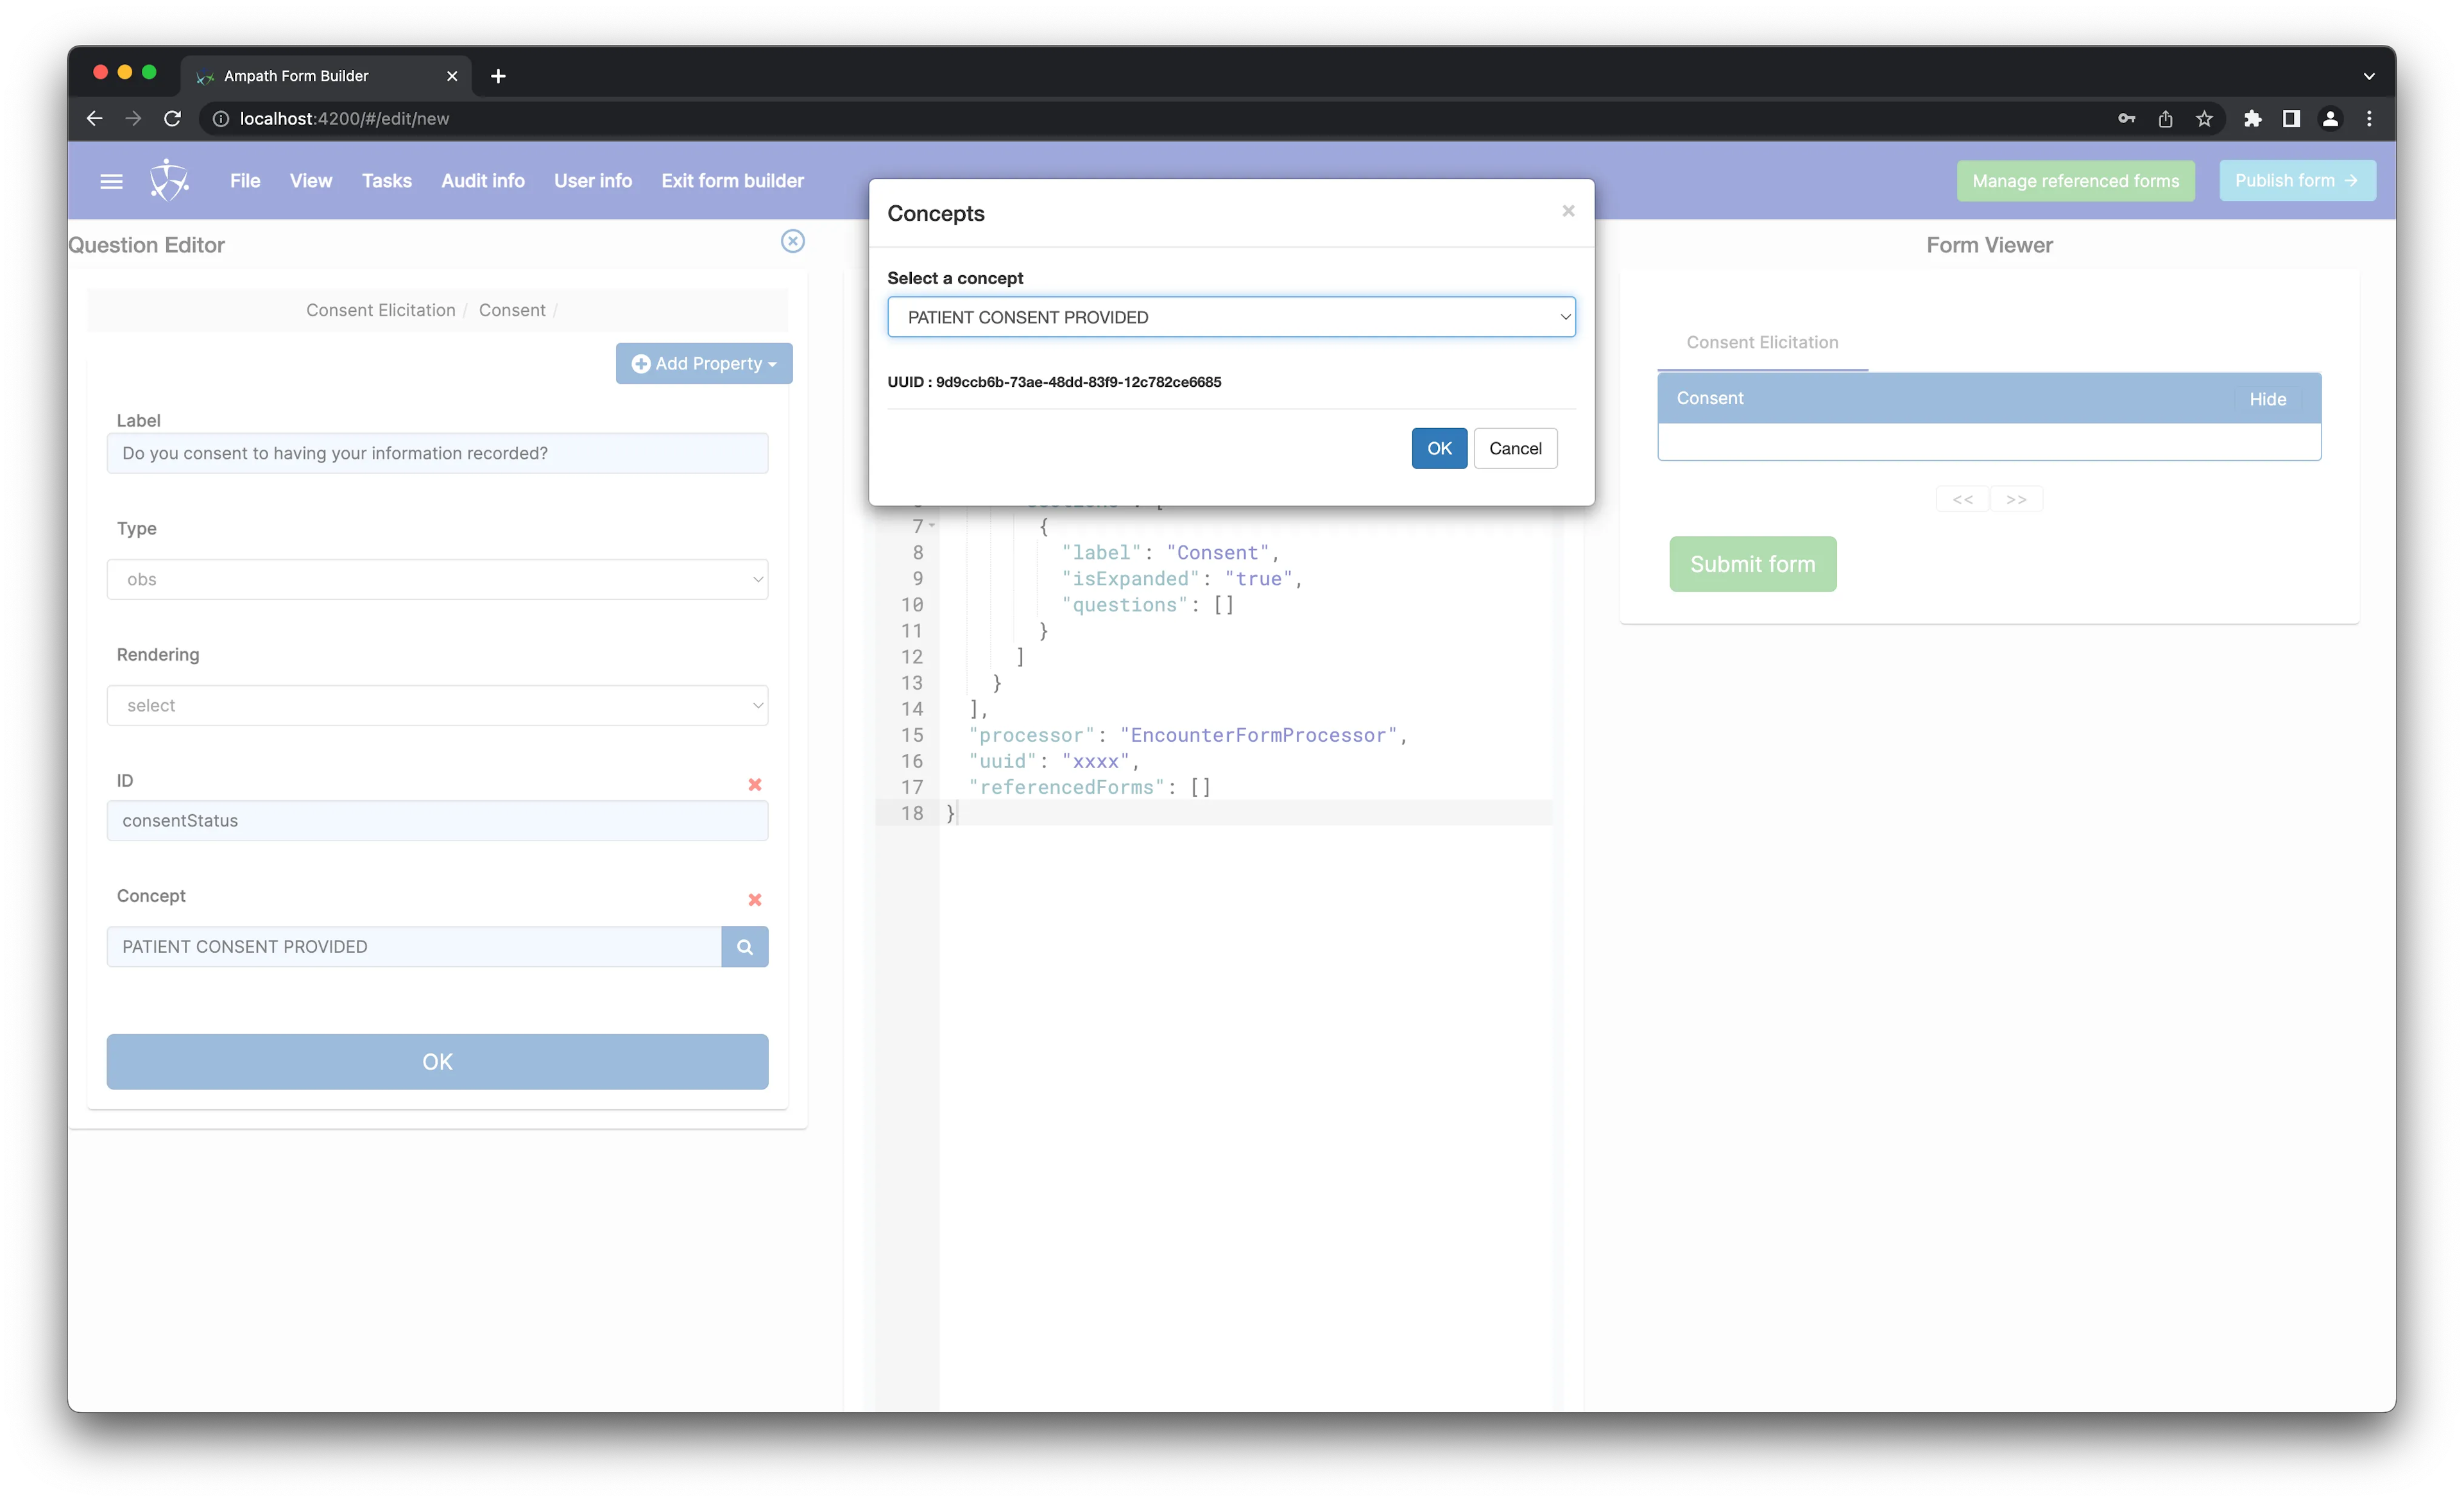
Add a question by clicking Create new question. This launches the Question Editor panel.
The question editor panel provides concept lookup functionality via your
concept dictionary. This functionality is contingent on your having set up the
relevant concepts ahead of time in your dictionary. This guidance makes the
assumption that your environment has a PATIENT CONSENT PROVIDED concept with
the ID 7656 configured.

- Enter
Do you consent to having your information recordedas the label. - Set the
Typeof the question toobs. - Set the
Renderingtoselect. - Set the
IDof the question toconsentStatus. - Enter
PATIENT CONSENT PROVIDEDin theConceptfield and click the search icon. This will launch a modal where you can conduct a concept search lookup. You could search based on the concept name, concept ID, or concept UUID. In this example, this concept search is conducted from the AMPATH concept dictionary. ThePATIENT CONSENT PROVIDEDconcept referenced here has the concept ID7656. Press OK to save.
A modal should now appear asking you to pick your desired Answers from a list of available Answers. Click Select All to choose both YES and NO.
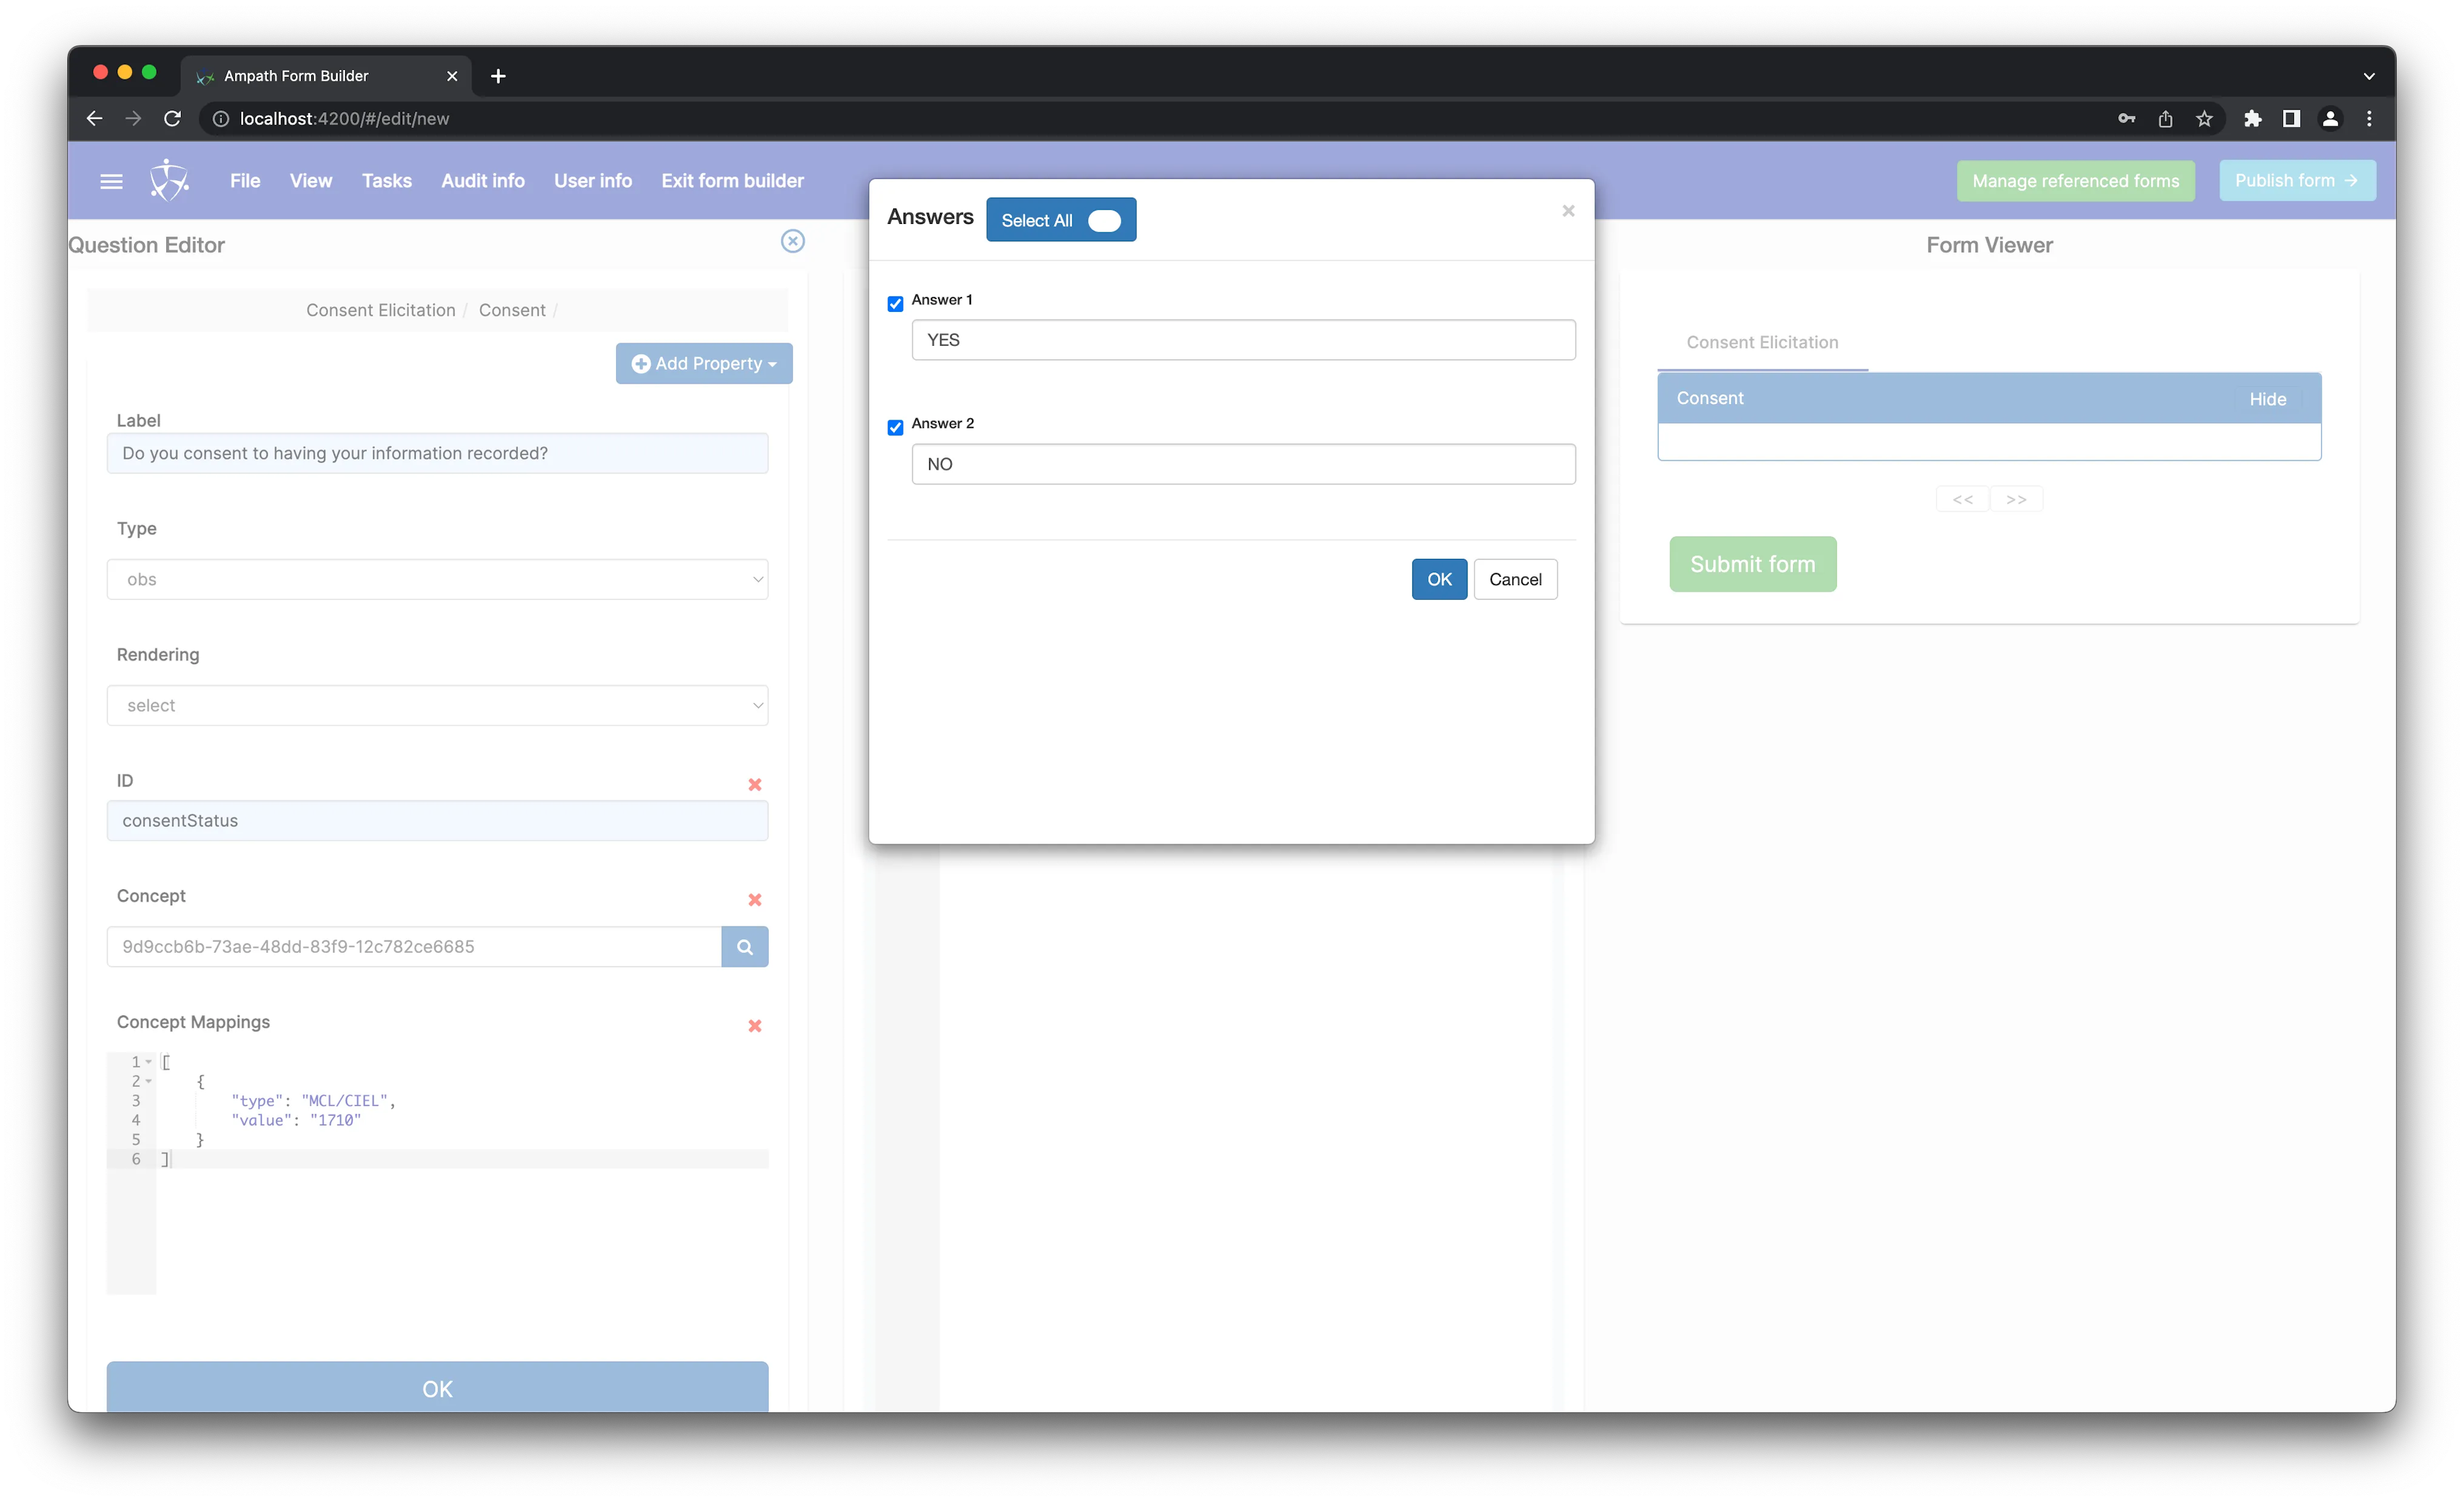
Click OK to save. You should now see the associated Concept Mappings and the Answers you chose displayed in the Question Editor.
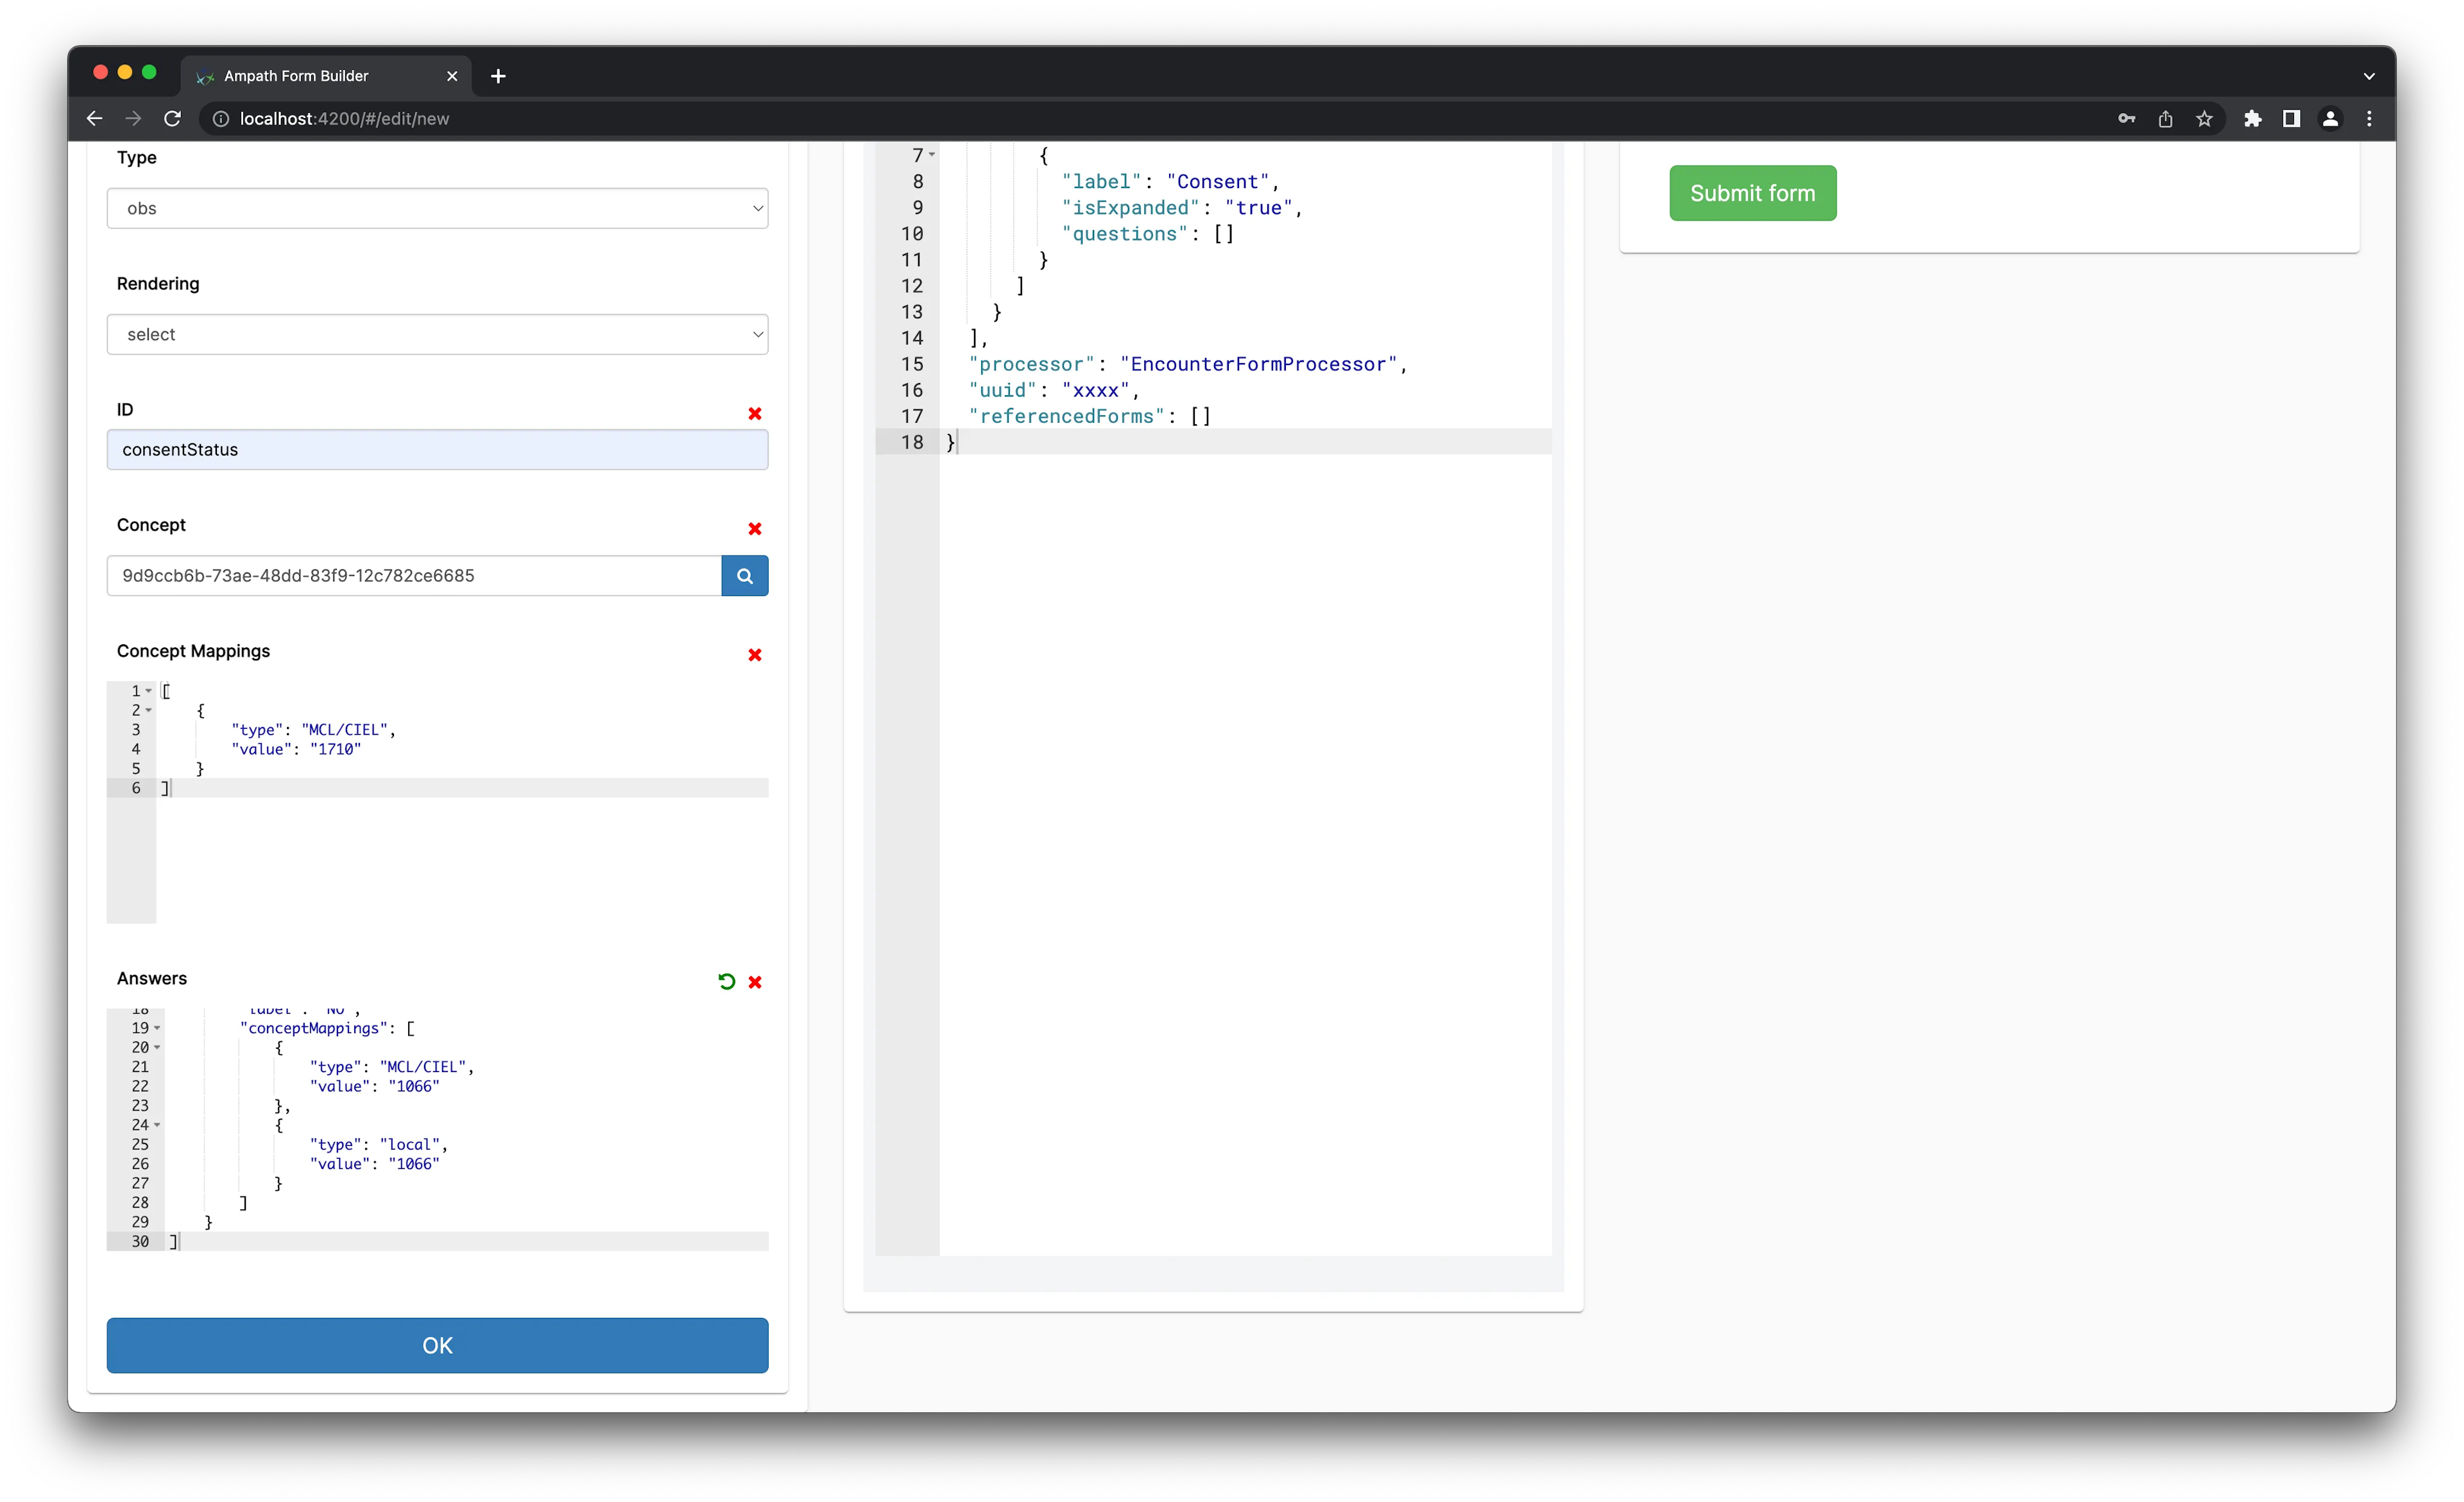
Click OK to save your form schema at this point. You should see an alert showing that the schema was updated successfully.
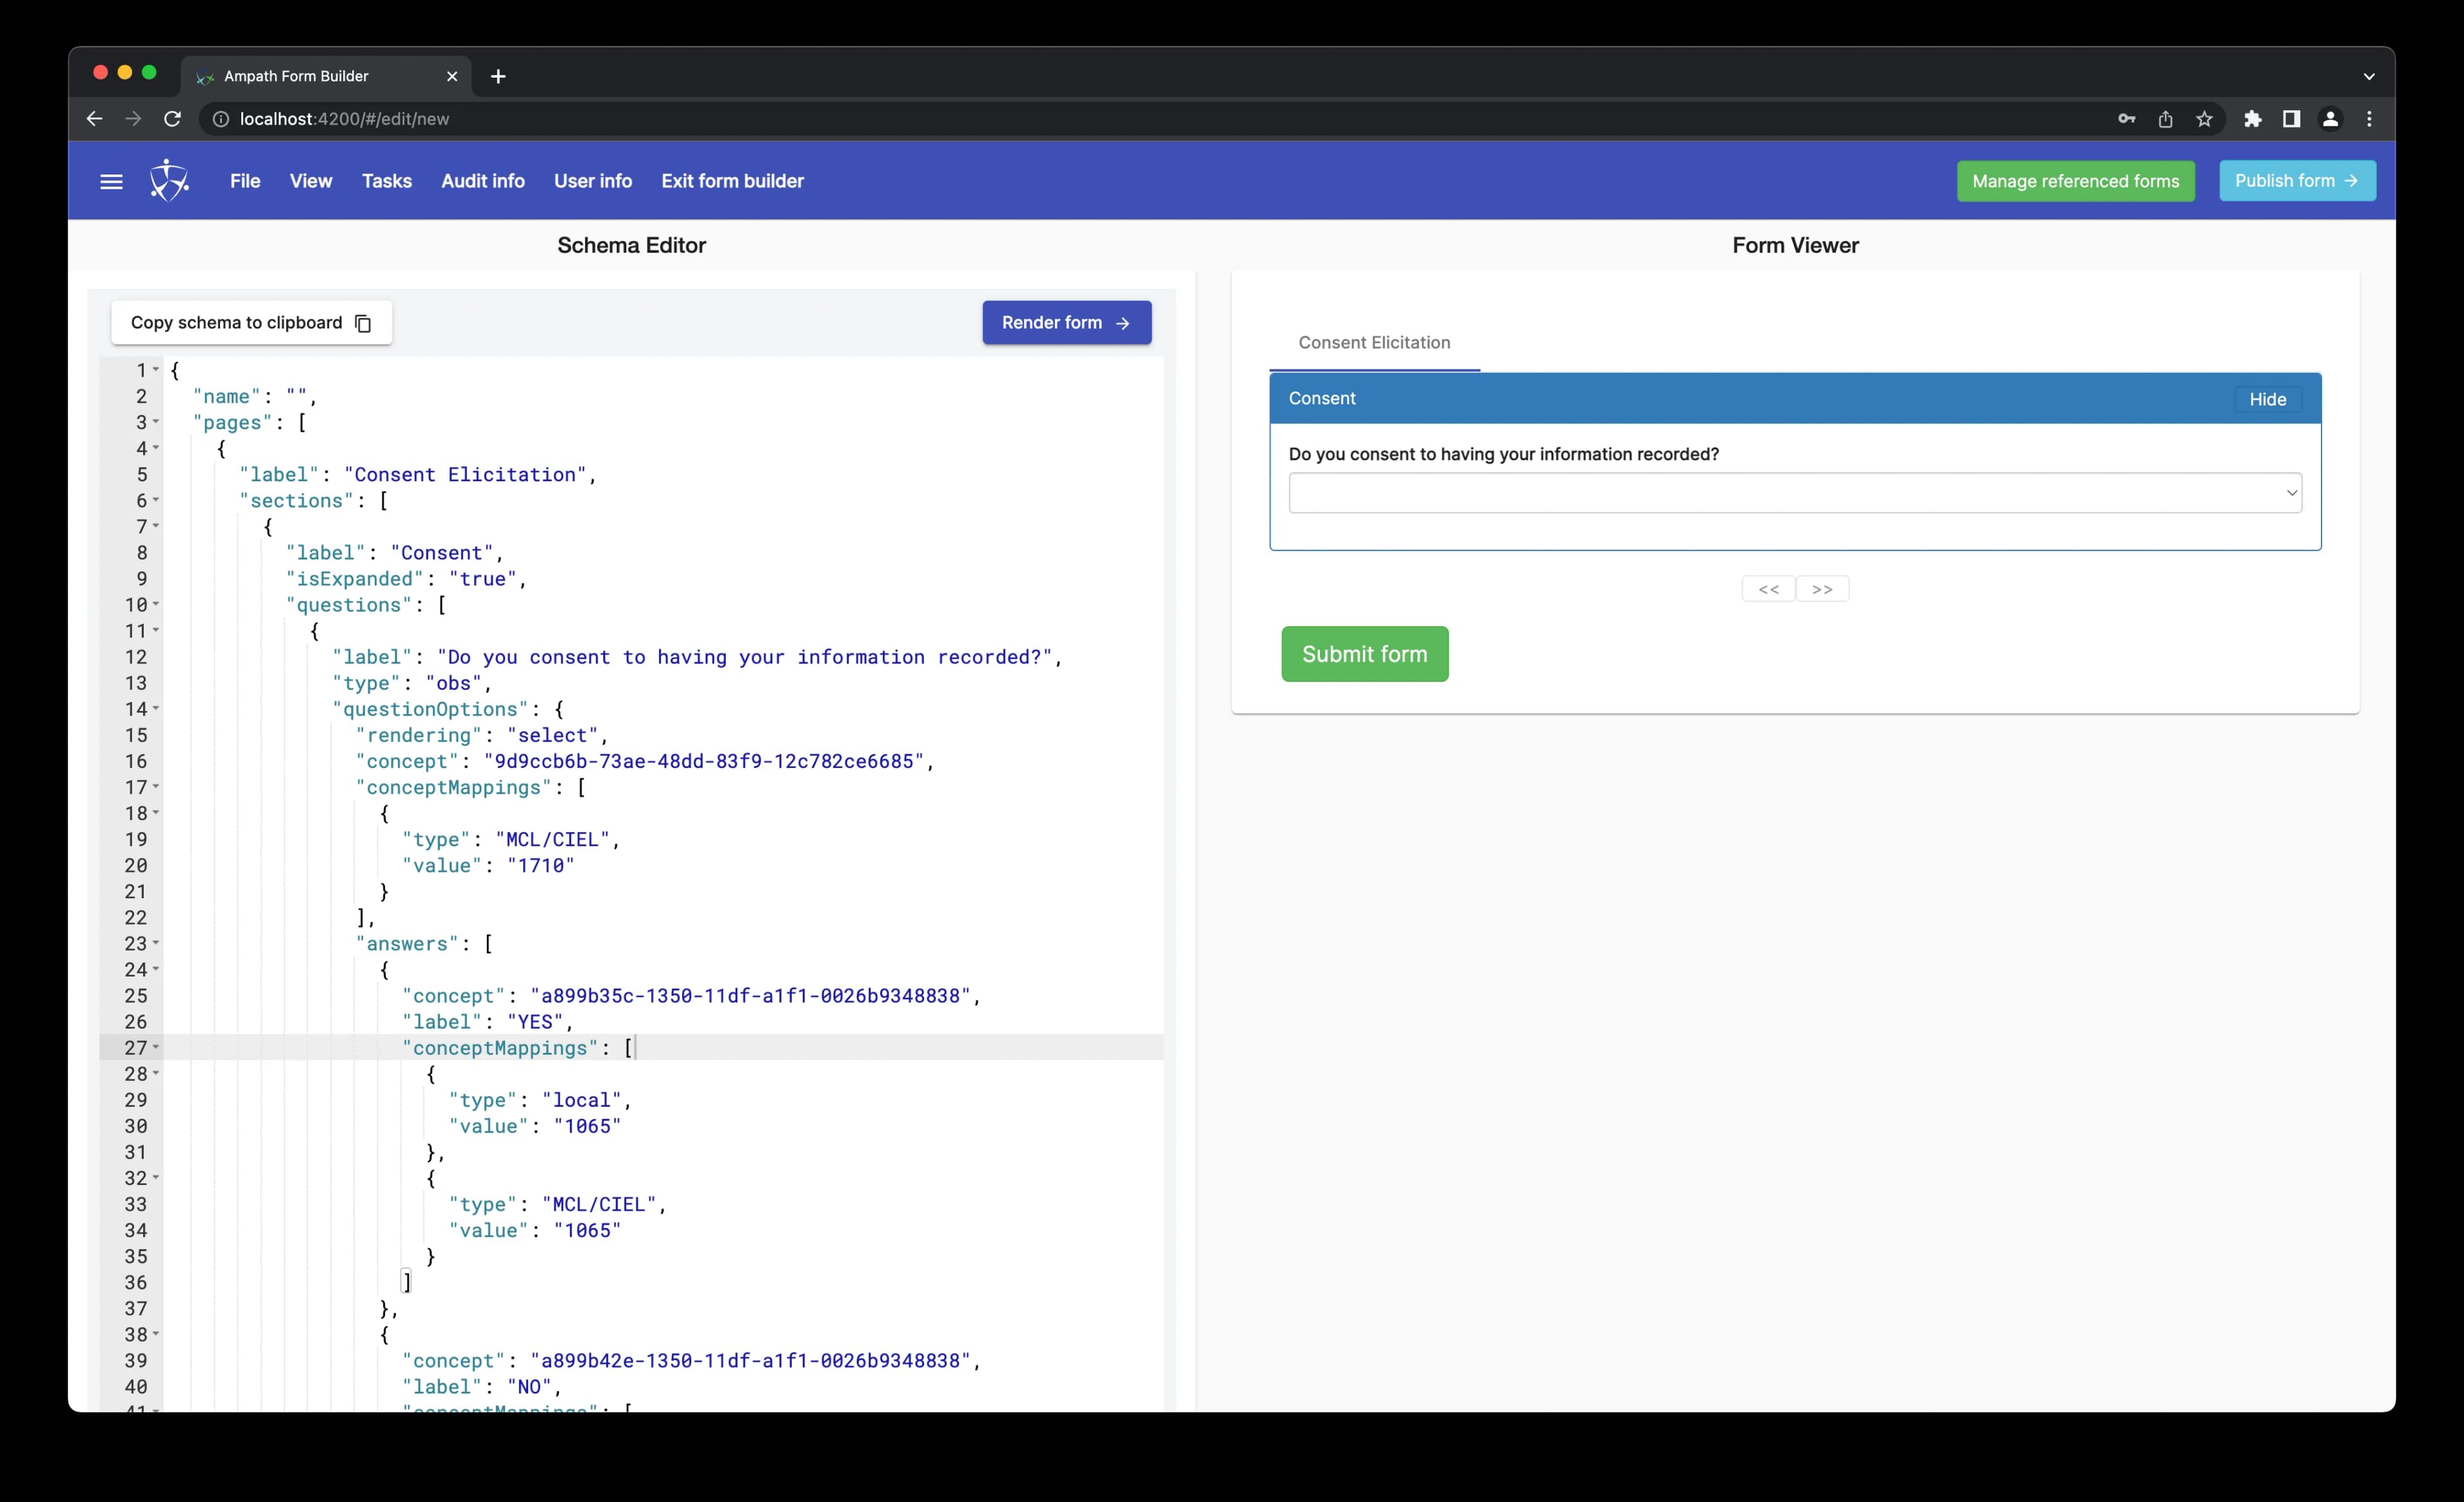
Your schema should now look like this:
{
  "name": "Test POC Patient Consent Form v1.0",
  "processor": "EncounterFormProcessor",
  "uuid": "xxxx",
  "referencedForms": [],
  "pages": [
    {
      "label": "Consent Elicitation",
      "sections": [
        {
          "label": "Consent",
          "isExpanded": "true",
          "questions": [
            {
              "label": "Do you consent to having your information recorded?",
              "type": "obs",
              "questionOptions": {
                "rendering": "select",
                "concept": "9d9ccb6b-73ae-48dd-83f9-12c782ce6685",
                "conceptMappings": [
                  {
                    "type": "MCL/CIEL",
                    "value": "1710"
                  }
                ],
                "answers": [
                  {
                    "concept": "a899b35c-1350-11df-a1f1-0026b9348838",
                    "label": "YES",
                    "conceptMappings": [
                      {
                        "type": "local",
                        "value": "1065"
                      },
                      {
                        "type": "MCL/CIEL",
                        "value": "1065"
                      }
                    ]
                  },
                  {
                    "concept": "a899b42e-1350-11df-a1f1-0026b9348838",
                    "label": "NO",
                    "conceptMappings": [
                      {
                        "type": "MCL/CIEL",
                        "value": "1066"
                      },
                      {
                        "type": "local",
                        "value": "1066"
                      }
                    ]
                  }
                ]
              },
              "id": "consentStatus"
            }
          ]
        }
      ]
    }
  ]
}
Render your Form
You can test your form at any point during the development process by clicking
the Render form button in the Schema editor.
Click Render form to test out your form. If your JSON schema is invalid, you will see an error displayed at the top of the Schema editor. Otherwise, if your schema is valid, it gets compiled by the form engine and rendered into a form in the Form Viewer.
The schema we've created gets rendered as:
It's looking like we're ready to ship our form. Let's do that.
Save your Form
To commit your form to the server, click File in the navigation menu and then click Save to Server. This will launch a modal asking you to provide the following information about the form:
- The
nameof the form (as you wish for it to appear in the server). - The
versionof the form e.g. v1.0. - The
Encounter typelinked to the form. - A short
descriptionof the form.
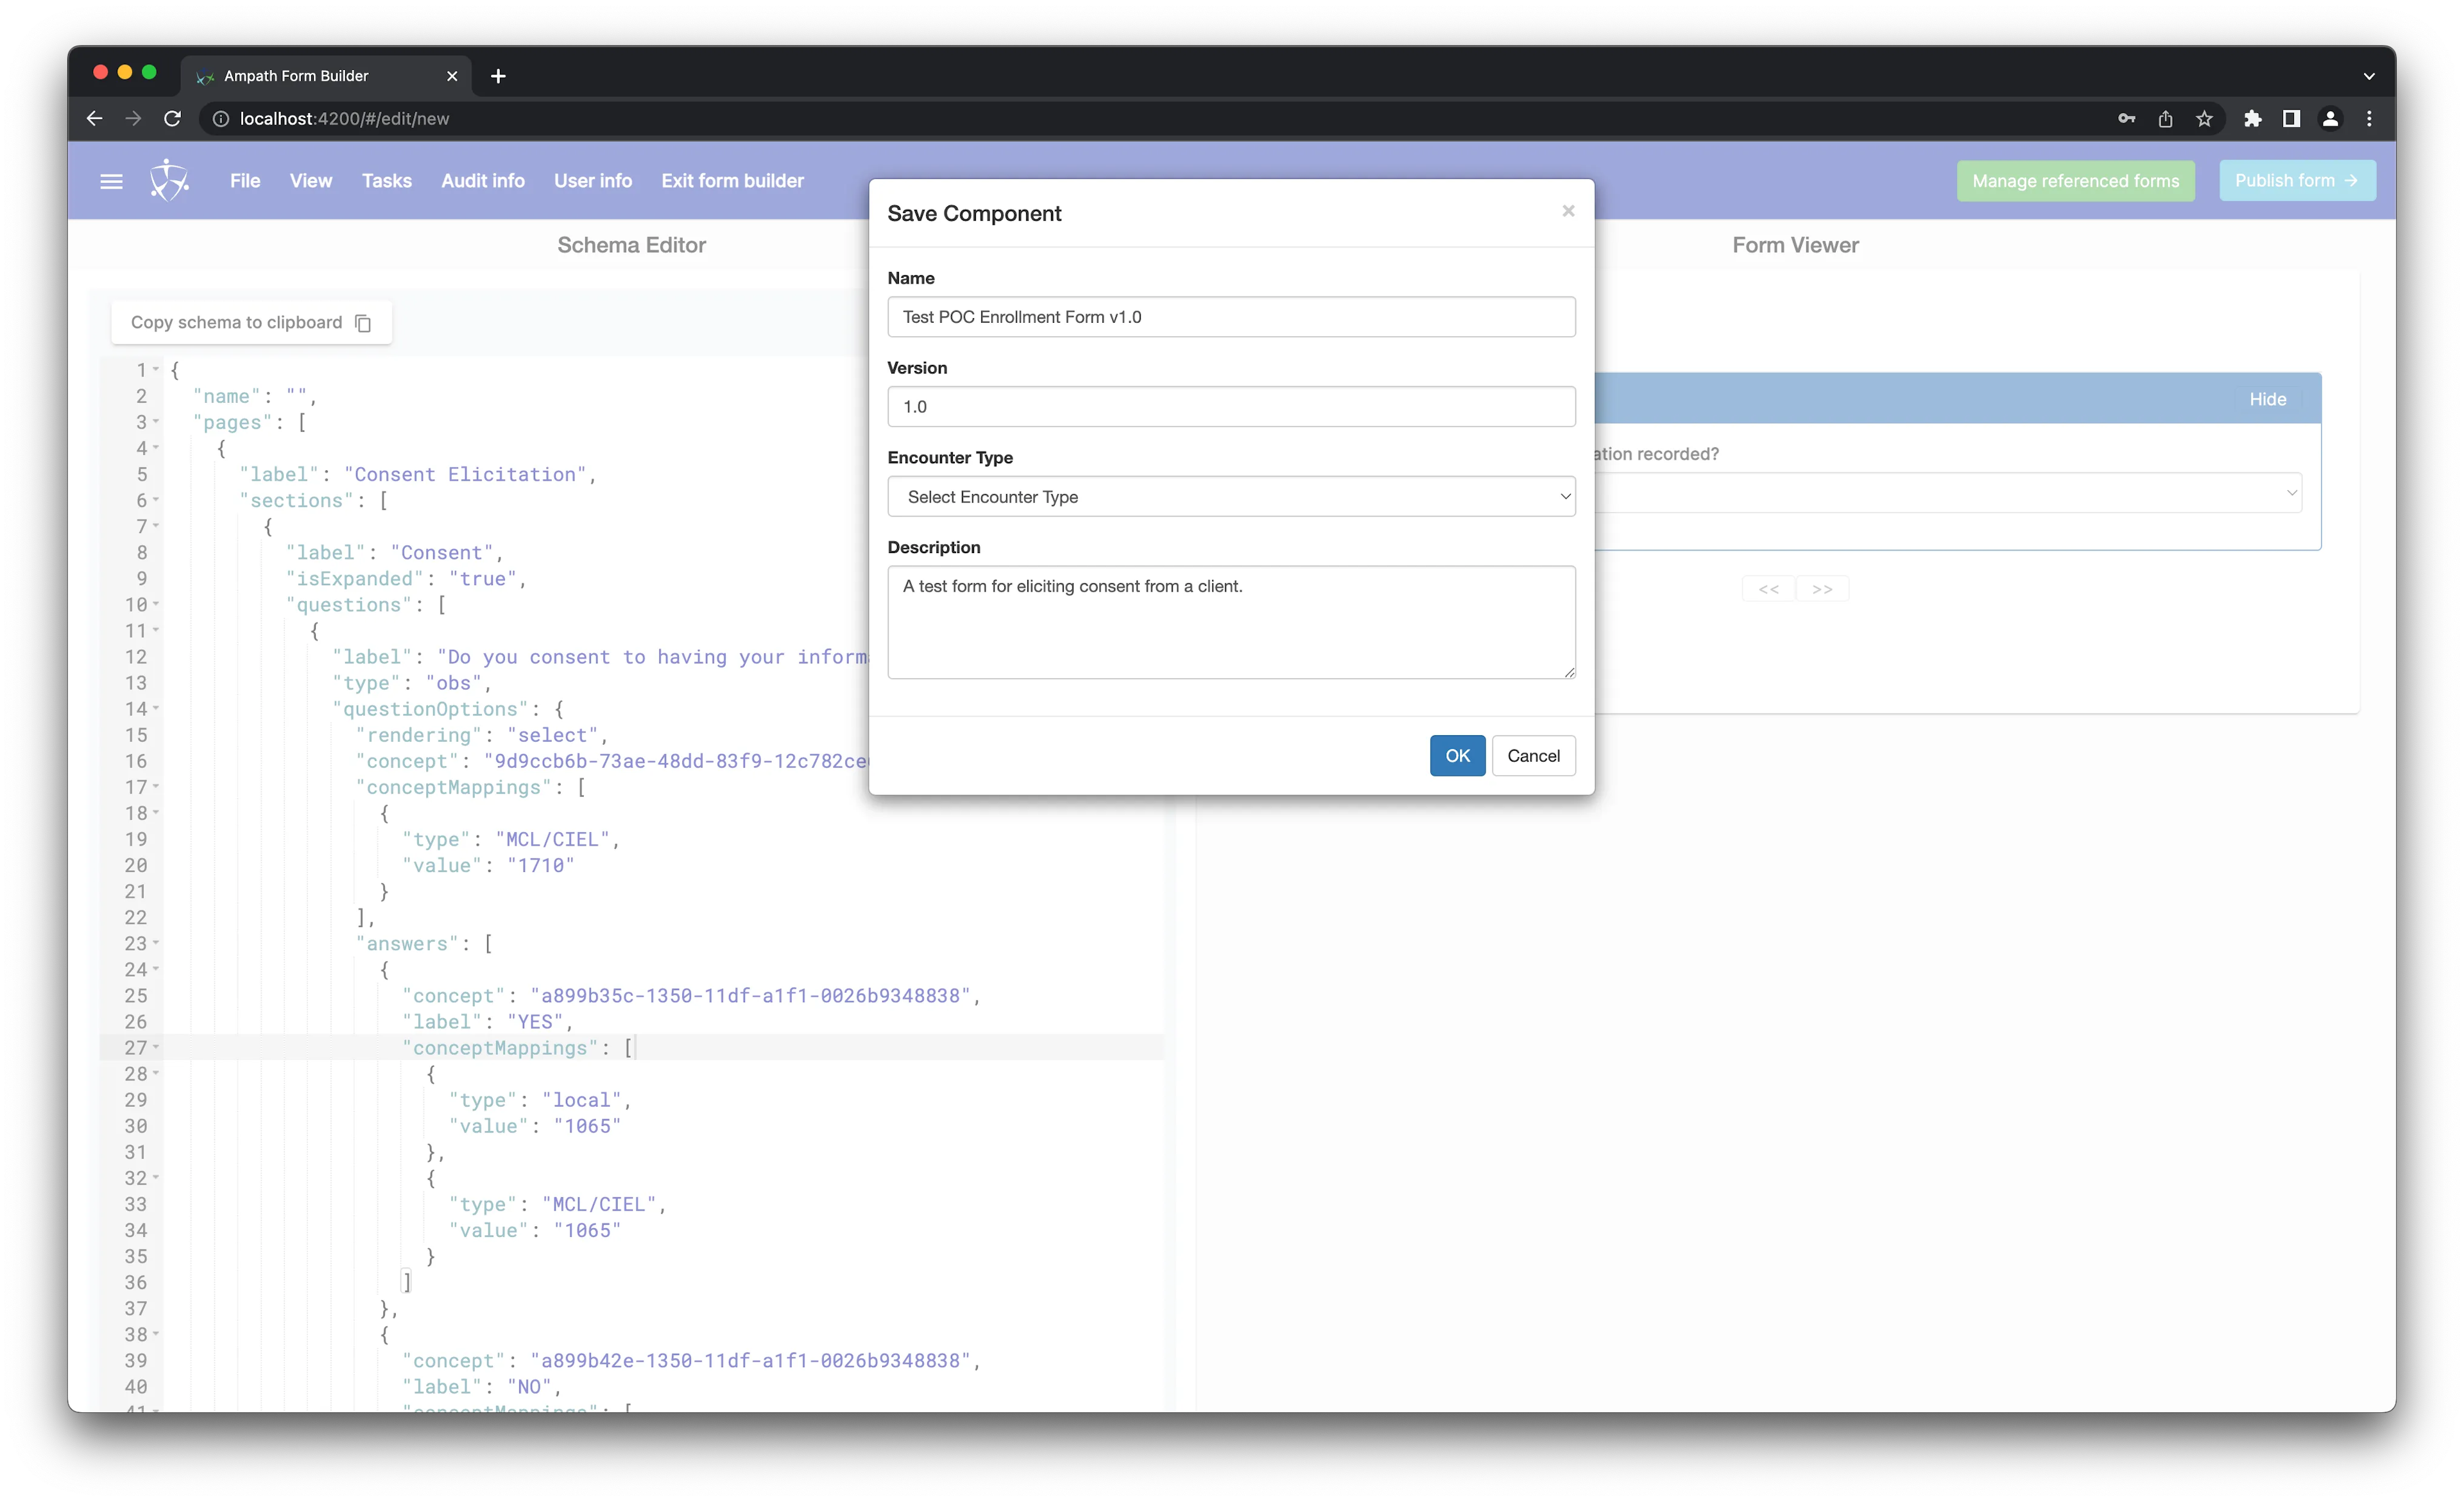
Once done, click OK to save your form, and then click Exit to leave the Schema editor.
You should now be able to see your new form in the Forms List.
You could choose to publish your form by clicking Publish form when in the
Schema editor.