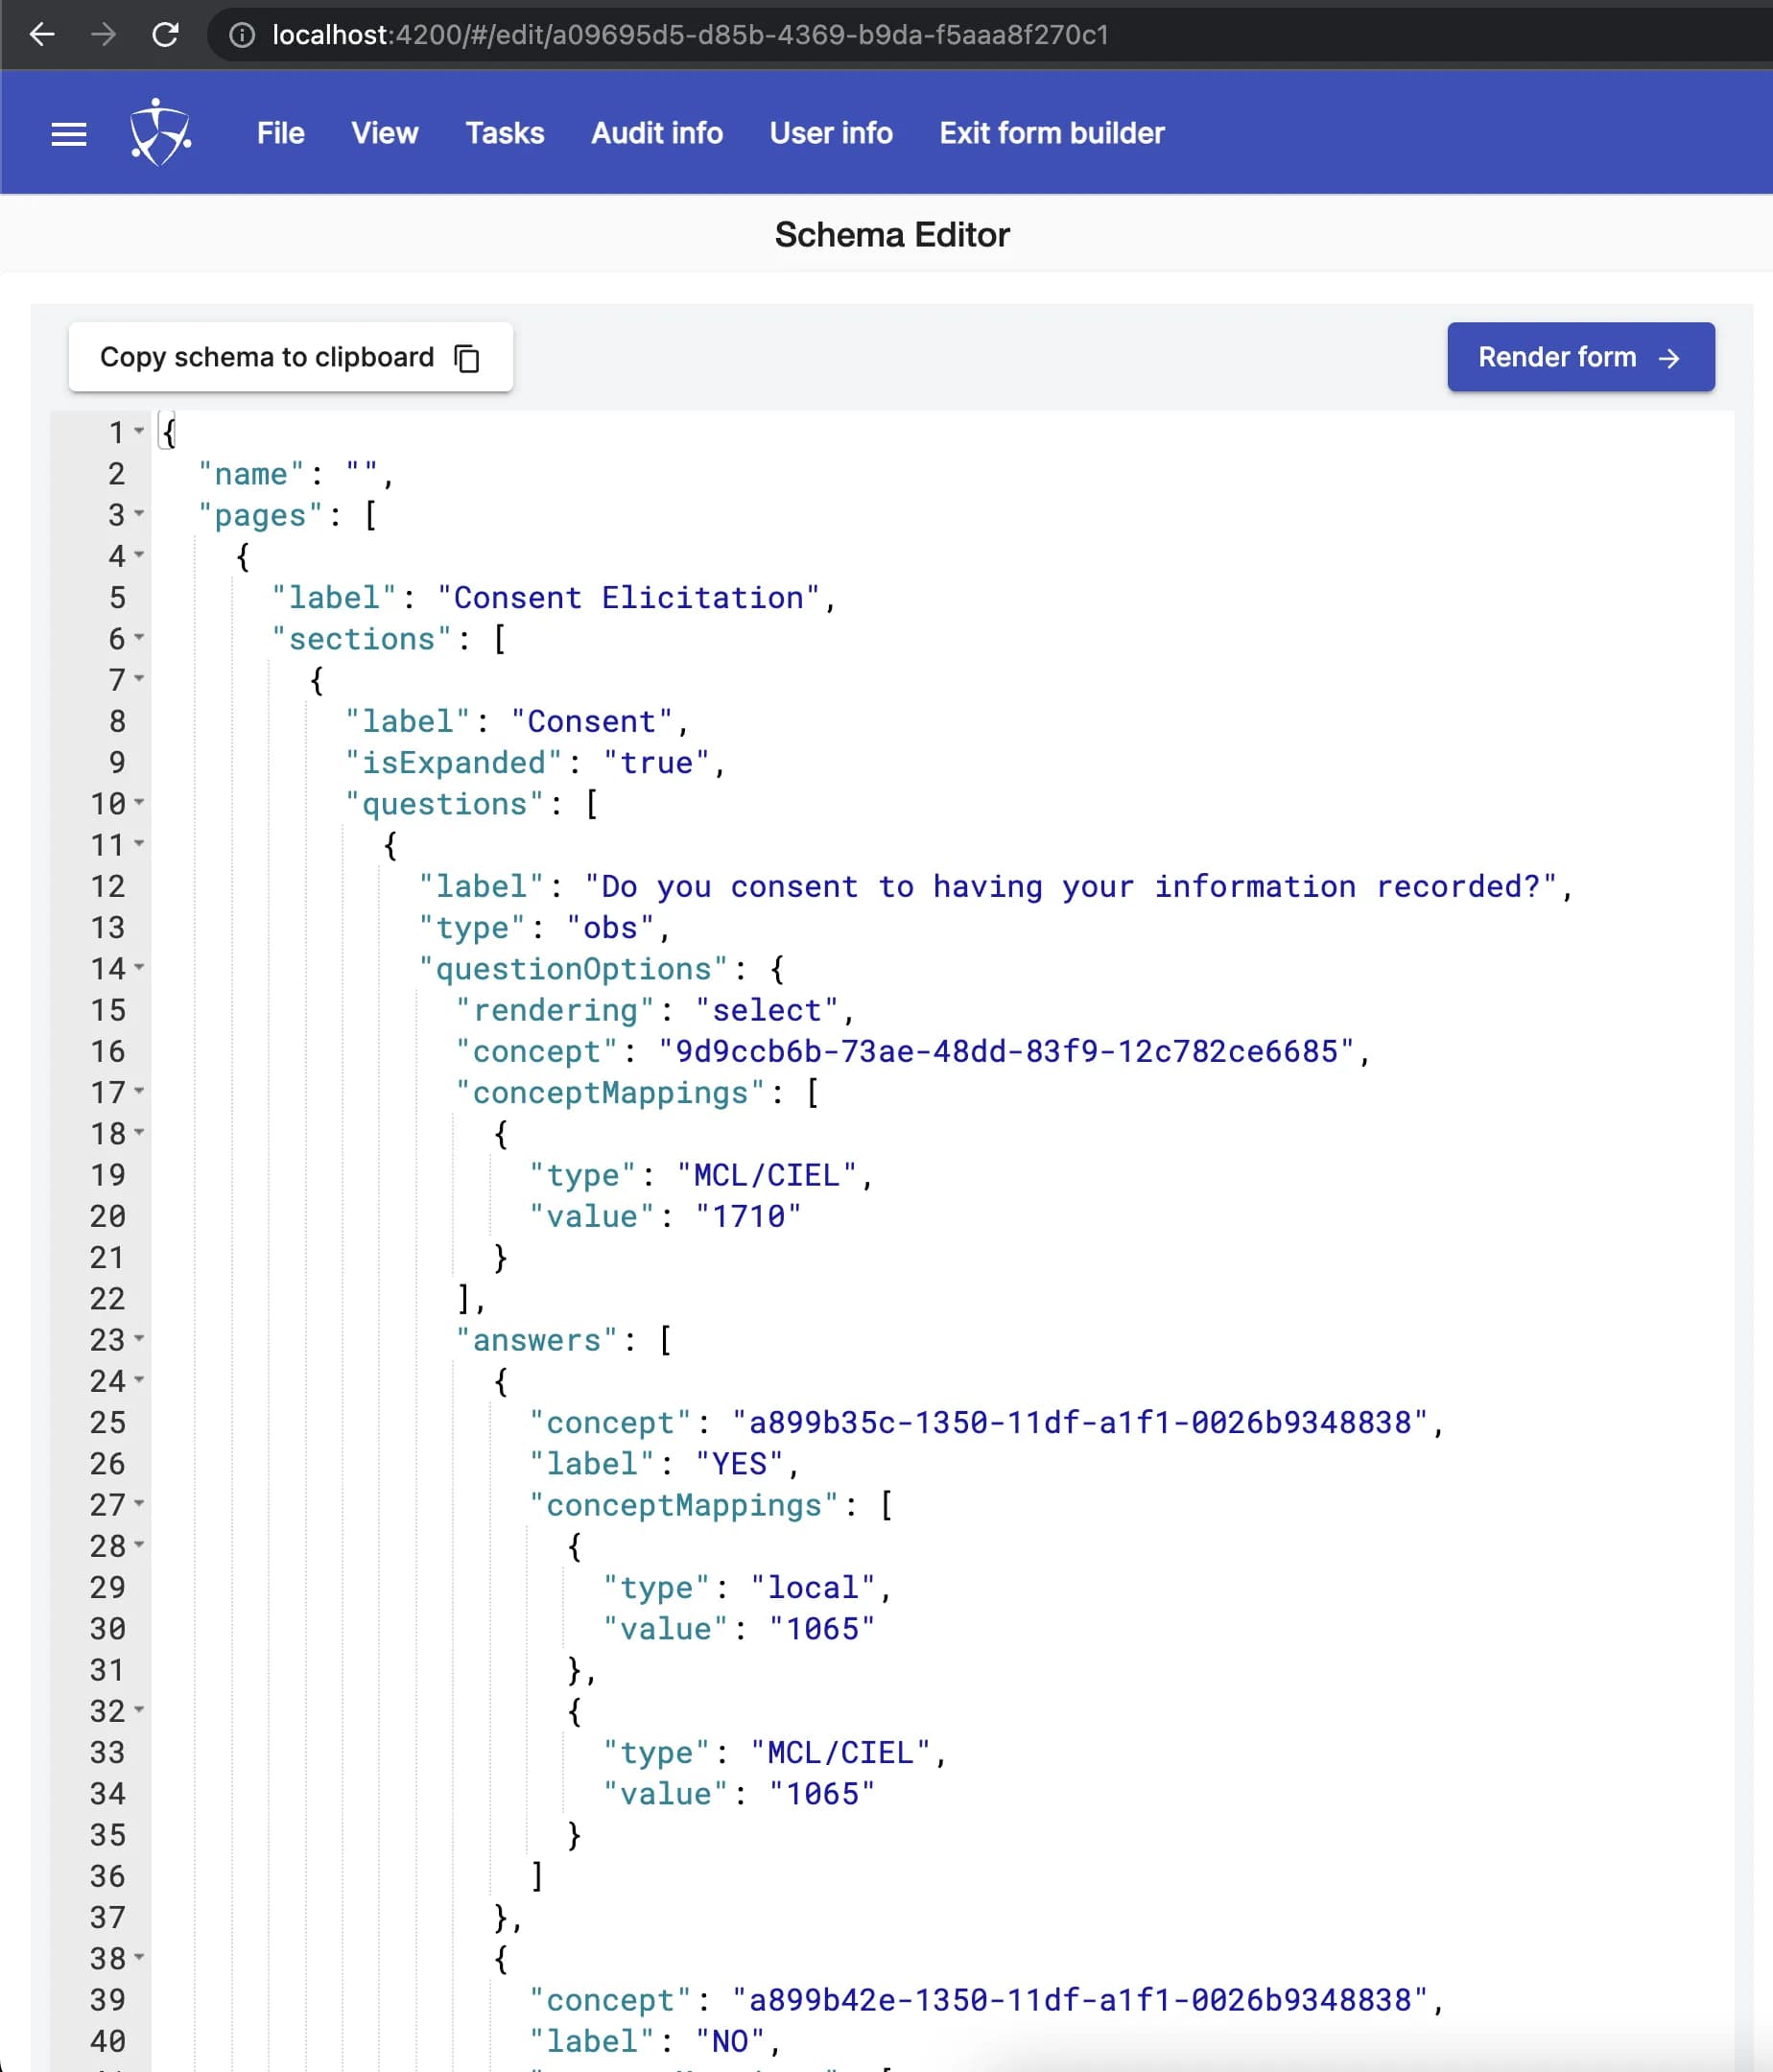
Schema Editor
The Schema Editor embeds a code editor (opens in a new tab) which is configured to accept JSON code. Upon clicking the Render Form button, your JSON code will get validated and rendered into a form in the Form Viewer tab. If your code is invalid, and error message will be displayed above the editor.

You can access the Schema editor by:
- Clicking
Create a new formto create a new form or a component. - Clicking the
Editbutton next to a form in the Forms List to edit an existing schema.
Features of the Schema editor
-
The interactive
Schema Builder. Accessible by clicking the hamburger menu at the far left of the navigation bar. -
The
Filemenu. From it, you can either:Save a form locallyby persisting the schema to your browse's LocalStorage.Save a form to the server.
-
The
Viewmenu. Allows you to toggle betweenTab ViewandSplit Viewmodes. -
The
Tasksmenu. Allows you to:- Add Concept Mappings to your schema.
- Validate Concepts.
-
The
User infomenu. This menu shows information about the logged-in user. -
The
Audit infomenu. This menu shows audit information for a form schema. This information includes form metadata such as the form name, UUID, version, description, and the associated Encounter Type. It also shows who created or modified a form and when. -
The
Manage Referenced Formsbutton. Clicking this button shows a list of components referenced by the active form. It also allows you to reference components from a handy dropdown menu. -
The
Publish formbutton. Allows you to publish your form schema. -
The
Schema editor tabrenders a JSON-based representation of your form schema in an embedded code editor. -
The
Form Viewertab renders the visual representation of your form schema once it gets compiled by the form engine. -
The
Render formbutton. Clicking this button enables the form engine to compile your form schema. This step ensures that your form schema is valid and free of errors. -
The
build timestampat the bottom right of the page shows information the current build version.